To this day, the portrait remains one of the most complex subjects for a representational artist to tackle. While many methods exist for artists to simplify this challenging subject matter, one of the most effective is to “abstract” the subject to a simple interlocking pattern of just two values—one light and one dark. A good example of this can be seen with the Japanese art of the “Notan.” Introduced to American art by Arthur Wesley Dow (1857 – 1922), among whose students was Georgia O’Keeffe, “notan” is a Japanese word for the interaction between dark and light. In 1899 Dow published a book, Composition: A Series of Exercises in Art Structure for the Use of Students and Teacher, that presented design as founded on three principles: line, color, and notan (notan meaning the massing of dark and light areas in a composition.)
Here is an example from Dow’s book:

Dow, Composition pl. X, “Notan”
Here are a few simple notan sketches of everyday objects:

And one of a portrait:

As many of you are quite aware, portrait work can often be riddled with a myriad of problems. All too often artists turn to increasingly complex methodologies and strategies to tackle this endeavor and more often than not – the results are problematic. However, if you understand how we are wired to perceive a face – you can simplify your approach rather than adding more parts to what may already be an ever growing “Rube Goldberg machine.”
While there are quite a few seasoned artists that can deal with incredibly complex variables when dealing with heads, hands, and facial features – the “less-seasoned” can easily drown in cannons of proportion, rigid measurements, and conceptual contaminants. This short presentation is the simple way that I have introduced “the portrait” to students over the years. Just like the Language of Drawing exercises, we will abandon more esoteric, overly-complex methods at the onset in favor of a simple approach for practice.

Rather than starting with a complex construction process of planes and features, such as a human machine or malleable mannequin – let’s first look at how we are wired to “see” faces”:
“If your temporal lobe is in good working order, your brain recognizes faces by analyzing the individual parts and then constructing a kind of natural barcode. According to a 2009 study in the Journal of Vision, your brain sees a face as a series of shapes. First your brain reads the eyebrows, eyes and lips as horizontal lines. Next, your brain takes a look at what is left over and sees areas of light and dark. The forehead, for example, may be a rather large area of light. But the hollows of your eyes or cheekbones may be interpreted as dark shadows. Your brain scans this information just like a barcode, and you identify a person either as someone you know or as a stranger."
You can learn more about the science of how we “see” faces by looking to resources like The
Journal of Vision’s “Biological Bar Codes in Human Faces” by Steven C. Dakin and Roger J. Watt.
(http://www.journalofvision.org/content/9/4/2)
So let’s try to tackle the portrait in a manner that seems quite conducive to how we are wired to understand it:
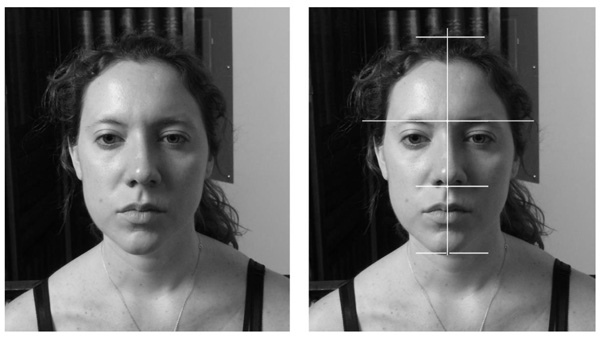
Looking at our model we can establish a general visual survey of est. height and width. We can populate a general center line with any horizontal measurement markers we would like (most common are est. eye, eyebrow, nose, or mouth lines.) This of course is a rough estimation survey and will serve as a general anchor for the patterns that follow.

Using your initial survey marks as a basic reference tree, begin to squint at your model to further isolate the patterns of light and dark that you are wired to observe. Record the interlocking pieces of light and dark to the best of your ability. You can establish these patterns with line or a single value to start (or both):

Remember you can begin with very simple shapes or envelopes and refine later:

As a start – this is far enough. Just repeat this until you can capture patterns consistently and accurately. Do not draw any features whatsoever! Do not use more than a two value separation scheme or simple line pattern at this point. For now, just focus on the macro patterns of light and dark until you can achieve accuracy consistently. You will start garnering good likenesses before you know it.
Practicing the Notan!
Here is our method of practicing the ability to break down a portrait into a notan of light and shadow:
The following links contain 12 sets of our portrait notan exercises:
https://anthonywaichulis.com/portrait-notan-exercises_1-4/
https://anthonywaichulis.com/portrait-notan-exercises_5-8/
https://anthonywaichulis.com/portrait-notan-exercises_9-12/
Download each collection of exercises above and then proceed to carefully read the instructions below: Please read the all instructions before jumping into the notan exercises. Make sure that you understand each step. Also, it should be noted that the following was written for artists immersed in the Language of Drawing program, and as such assumes the use of compressed charcoal and white pastel. However, it should be noted that these exercises can be adapted for any materials.

STEP 1
_Print the “Model(x)_OVERLAY” (A) on a Transparency sheet. You can do this at a retail printer like Staples or Office Max, if your home printer cannot. Print each of the remaining images from the set on regular paper – no need for high-quality photo prints. MAKE SURE ALL PRINTS ARE THE SAME SIZE—THIS IS CRUCIAL! (Also – you do not have to print both D and E – only the one that will match your drawing surface (white or toned). (NOTE-ONLY D IS INCLUDED IN THE ABOVE COLLECTIONS AS "Model(x)_Notan.)
STEP 2
Observe the image titled “Model(x)_Image” (B). Study the patterns throughout. Now compare “Model(x)_Image” (B) with “Model(x)_Image_Notan” (C). See if you were able to visualize the patterns seen in C. Now, proceed to draw the notan pattern without (or with minimal) measuring device use from image C. With a pattern cartoon established, proceed to fill all shadow patterns with one even value so that the result mimics D. Check with OVERLAY.
STEP 3
Observe B carefully again. Study the pattern throughout. This time generate the drawing from image B (again, mimicking D). Again, check with Overlay. So again – draw the portrait pattern study twice. Once from C (model with pattern guideline) and once from B (no pattern guideline). Populate both with cartoon and one single value. Check results with the OVERLAY (sheet A).
STEP 4
After the first 4, we see that the sets contain additional image, “Model(x)_Notan_Dark_White”. (Number 5 of set 2 breaks these into two files so you can see the steps even more clearly.) Only after you can produce a consistently successful notan should you consider expanding the value structure beyond the two (light/dark). Prior to the addition of white, it is recommended to push the dark values toward material anchors. (if you are not familiar with anchors, a simple search on this site should lead you to the appropriate resources.)
With dark anchors established, you may begin to add light anchors and additional light values that may fall lower than white. Eventually, you may begin to mix the black and white to build gradations and refine the surface finish of the drawing.
STEP 5
It is incredibly important not to limit your portrait notan exercises to “drawing from the flat”. The above exercises are a good place to start but I recommend that you take every opportunity to practice this notan simplification from live models. This will make sure that you skills are as adaptable as possible and will allow for a much greater range of creative freedom.


