Last year I made a frame for my version of Vermeer’s “Girl with a Pearl Earring” using a table saw, (with a home made 90º jig in place) and some decent looking moulding, this was glued and held with one of those adjustable band clamp things to hold the corners rigid. This worked very well but was quite an operation, here’s an in progress shot of that:-
So last month in advance of Christmas I’d completed a small painting of my little boy (a present for my wife) and really wanted to get it framed nicely - I didn’t want to buy a long length of moulding just for this tiny picture (not to mention the difficulty of finding the time and secretly making one) but fortunately one of my customers (through my computer business) is a picture framer! So in return for me sorting out a bunch of her IT problems, I asked if she’d help me make a frame in her workshop, show me the ropes and use her professional kit and expertise. Deal!
So we chatted a while about tastes and frame styles and tried out a bunch of sample corner pieces against my picture to get a feel for the look. Three things I took away from that:-
- Small pictures often look better with wide frames
- Particularly in a portrait - matching the complexion to the frame can be very effective - I very nearly went with a very pale rose gold frame in this instance for this reason.
- If I’d have gone with a completely dark frame (I like how striking black frames can be) it could have competed for attention and been a bit overpowering in this instance - I wanted the eye to have greatest contrast.
So as it happened I chose a two tone moulding, there’s the darkness in there as well as a golden inner and outer border to balance it out. And there’s even a hint of red in there so it’s kind of Christmassy.
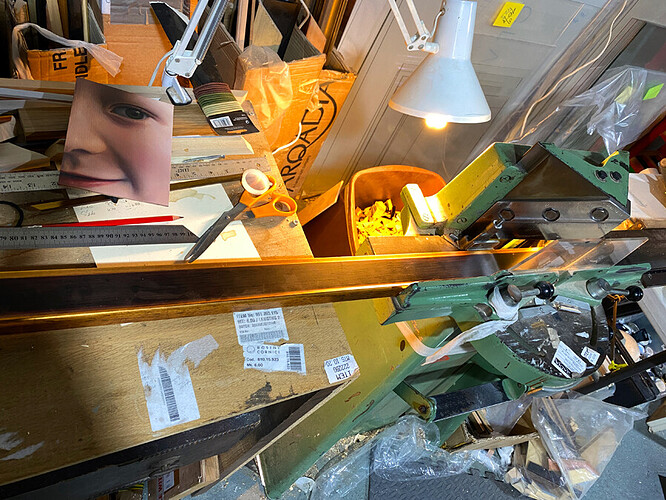
So we got the moulding (and these things come in 5m lengths so a bit of room is required!) there was a good amount of measuring, checking and comparing sides up against the picture (canvas mounted on board) and we then decided to put some spacers around the interior bezel of the frame to make as much of the image visible, I’d painted right up to the edges and stood to lose a couple of mm all around if this hadn’t been done. All this kind of thing all has to be accounted for in advance, then we lined the pencil marks I’d measured out on the moulding up in this enormous manual foot operated moreso mitre guillotine and with a few sexy lunges I had cut out all of the sides. Yeah, you could do this bit with a mitre saw, but man this guillotine was too cool not to use, it’s the big green metal monster on the right:-
Then I used an underpinner to fire V shaped staples into the frame corners with compressed air (as well as glue) a fletcher point driver to fix metal retainers behind the picture to hold it in place and then we put some moisture barrier tape over the back to finish off.
It was really interesting using all the kit, and in the UK you can get hold of most of it, as well as a large selection of mouldings from:- https://shop.diyframing.com
Anyone else had any involvement making their own frames?
I’m also very interested to hear what people like in a frame, and if there are any rules of thumb for choosing colours/widths/styles that you find work for you.


