2025 Online Alla Prima Challenges (II) Resource

2025 Online Alla Prima Challenges (II) Resource

Third Annual Online Alla Prima Challenge with 20 All New Challenges!!

20 live painting alla prima sessions over 20 weeks (plus an introductory orientation) beginning on: January 12

WHEN: Thursdays – 2 pm to 3 pm EST. with Orientation starting January 16th, 2025

Welcome to the official Smartermarx thread for the 2025 Online Alla Prima Challenges. Sessions will be carried out each Thursday at 2 pm EST. Each session will last about 1 hour, which includes 30-45 minutes of painting time (depending on the challenge for that week) and 15-20 minutes of discussion about the goals of the exercise and some tips to make the effort more successful. After each session, participants will have one hour to share a photograph of their effort in a shared Dropbox folder that will serve as a private learning gallery for all participants. Links to the folder will be made available in an email like this one that precedes the session.

Prior to the first painting session, I will be hosting an “Orientation” session on January 16th. This will serve as an introduction to the challenges, a walkthrough of the primary goals, what is needed to participate, the role of the Dropbox gallery, and a general Q&A to ensure everyone is ready to go on January 23rd!

TO REGISTER: Please complete and submit the appropriate email sign up form on Anthony Waichulis’ website on this page: Online Classes and Events | Art and Articles

For all inquiries: allaprimachallenges@gmail.com

If you are interested in learning about the last series of challenges, you can see the initial full schedule here: Alla Prima Challenges. Also, if you are interested, Smartermarx has additional info on the general strategies that I often use to approach the alla prima (specifically the SNAG concept – Survey, Notan, Anchors, and Gradations.) If you wish to join us, please sign up today! (You can unsubscribe from the list at any time.) Please forward any additional questions to my administrator, Anya Dribas, at aaaw.anyadrs@gmail.com.

JANUARY 16: ORIENTATION

Here you will find all of the information (appropriate links (including Dropbox folder links for image sharing), notes, reminders, etc.) for The 2025 Online Alla Prima Challenges.

NOTE: Please respect the work, rights, and privacy of participating artists. You may view the efforts in the following Dropbox folders from the sessions for educational purposes, but you may not download or manipulate their work in any way. All files in the Dropbox folders will be deleted 2-3 weeks following each session. In addition, please know that live sessions, including questions and contributions from participants, will not be recorded to respect each participant’s experience.

Certain files may be included for participant usage (provided by Anthony or Anya and may be downloaded.) Such files will be indicated during the relevant live session.

Key points from the Jan 16th orientation session:

  • Please keep yourself muted during the session unless you are part of an active conversation. Here are two tips for quick muting/unmuting during Zoom sessions:
  1. While muted, press and hold down SPACE when you want to talk. This unmutes you temporarily.
  2. Keyboard hotkeys for toggling mute:
  • • Mac: Command(⌘)+Shift+A
  • • Linux: Alt-A
  • • Windows: Alt-A
  • The primary goal of the sessions is to illuminate the consequences of the fundamental components (concepts and actions) of your process by utilizing timed, narrow-focus challenges that can provide fast feedback and useful insights.
  • Sessions are not intended to be a demo series. This is a group activity that works best for both the group and the individuals when participants engage with the activity in concert. In addition, the series is not intended to instruct anyone to “paint like me,” but rather to analyze the fundamental components that make up YOUR process with short, controlled challenges.
  • While “I’d like to watch first, then try it on my own–on my own time!” may sound intuitively advantageous, in my experience, such a practice often leads to diminished returns. Again, the sessions are not designed to teach people to do something like I do it (although I am elated if any aspect of my process proves useful to you.). Rather, this is about analyzing your own output, generated with adaptations of your own process, in a context that has been demonstrated to yield productive feedback.
  • If you are not sure exactly how to approach a specific aspect of the alla prima—don’t worry—just give it your best shot (using even a “best guess” if necessary.) We need to make mistakes or even an outright mess to find meaningful development. Avoiding experience will get you nowhere. Additionally, I find that it is often far more effective (in a learning context) to try and “modify,” add, or delete a component of an existing process when the experience of the process and the relationship to the resulting product are fresh in your mind. Remember that experiences (especially what you might deem mistakes, errors, frustrations, etc.) will also cultivate the most useful questions for you that I hope we can answer together. (I’ve referred to this practice as “building an experience database.”
  • You should be ready to paint right when the session starts with your subject matter arranged and illuminated, your palette and brushes at the ready, and have the criteria for the session in mind.
  • When selecting, arranging, and lighting your subject matter, keep in mind the guiding principle in this context:

RECOGNITION MUST SURVIVE ABSTRACTION!

  • Regarding pre-mixing rules: What this means is that you are forbidden from mixing locals or other observable “color notes” perceived within or around your subject. Such mixing should be done “on the fly” (i.e., as part of your painting time.) This limitation pushes you to exercise your intuitive or heuristic-based understanding of color dynamics. Pre-mixing limitations can also push one to experiment in a more cavalier manner with buffer or step colors (or chromophages) (which are colors that are added to a particular painted passage or transition to appear closer to the perceived transitions within your subject (often generated by illumination or reflectance properties.) It is very important to acknowledge and remember that observed transitions with your subject do not often map to a simple mixture of the obvious categorical components that may define the poles or anchors of the transition. For example, a transition that may be observed to evolve from a fairly bright yellow to black will likely not be matched by simply mixing black and yellow paint. More colors will need to be involved.

  • Additionally, the pre-mixing limitation may push you to explore means of hitting certain perceived color notes with an analog application dynamic, surface topography, etc. that may move beyond what we would expect with simple pigment mixing.

  • SWITCH COSTS: One can find incredible advantages in efficiency and effectiveness with minimizing “switch costs” during their process. Simply speaking, switch costs are the time, mental, and physical costs incurred when switching between different tasks. For example, I highly recommend that that palette arrangement is made consistent to avoid “hunting for colors”, making sure you have enough paint out to avoid stopping to replenish the palette, and keeping all required brushes within arms reach so you don’t have to break from your work time to retrieve them, etc. These things can aggregate to seriously impact a 30-minute exercise, putting you at a great disadvantage. (This is a great example of how a 30-minute alla prima challenge can illuminate something that may be plaguing your day-to-day painting practices.)

  • PROXIMITY: I urge everyone engaging in these exercises (or any observational representation for that matter) to consider the subject’s proximity to the representation target (canvas, panel, etc.) As we observe our subject, we attend to the things that we feel may best serve our end goal. However, as we turn from our observed subject to observe the target surface—the information garnered from the subject begins to fade from our iconic and short-term visual memory. It becomes subject to compensation or enhancement from our long-term memory, which is incredibly imprecise. Iconic memory is the visual sensory memory register pertaining to the visual domain and a fast-decaying store of visual information. Iconic memory is described as a very brief (<1 second). Visual short-term memory (VSTM) is a memory system that stores visual information for a few seconds so that it can be used in the service of ongoing cognitive tasks. Long-term memory (LTM) is the memory store that can hold informative knowledge indefinitely. However, long-term memory is by far the most abstract and imprecise.

  • The palette draw rule means that after a certain number of brushstrokes, you must pull more paint from the palette (reloading the brush), or you may void the brush altogether. This is done to ensure that you are not over-modeling the study relative to the challenge (i.e., unwarranted surface manipulation that leads to value/color contamination or excessive “blending” without drawing development or material application.) For example, a 5 stroke palette draw rule means that you can only apply five strokes before you must wipe and/or reload the brush—thus encouraging the artist to think more “economically” and deliberately about brushwork. Additionally, the stroke rule should not be seen as a “minimum” number of strokes you must make prior to making a change to the brush—but rather, a maximum. Lastly, large homogenous regions, scrubbing, and early line work are all exceptions to the stroke rules unless otherwise stated (as they do not usually carry an immediate over-modeling or contamination threat.

  • A reminder newsletter will be issued via email each Monday with the Zoom link for the following session, along with a description of the challenge so that you may acquire the subject needed as well as any other pertinent info.

Anthony’s Palette is based on, or adapted from a traditional double-primary configuration:

NEXT SESSION: JANUARY 23th

NEXT SESSION: JANUARY 23:

Challenge #1

IMPORTANT NOTICE: As mentioned in orientation, please direct all inquiries about the Alla Prima Challenges to: allaprimachallenges@gmail.com.

Ok, about this week’s challenge: Get your Feet Wet

The criteria for this week is simple─anything you like adhering to the following criteria:

Keep time to 30 minutes or under; limit yourself to 5 strokes before brush reload or void in non-homogenous areas (surveys and cartoons are exceptions as well.), and avoid premixing.

Again, anything you like─just try and have some fun.

ANALYZE AND STRATEGIZE:

To make the most of these exercises, it is important to try and spend some time studying your own work and the efforts of the others in the group to build a strategy for growing success. Here are a few topics to think about when studying the efforts of Challenge #1 and strategizing for Challenge #2.

1. Small changes. When you are analyzing your work and planning for the next session, I would recommend limiting the number of changes you might make to your approach/process. I find, in general, 2 or 3 changes to your approach are more than enough to bring about a significant difference. If you start to change too much at once, assessing the impact of any one factor can become more difficult. In addition, in my experience, when people start to get frustrated, they tend to “run home to Mama.” This means that they will likely default to whatever they have been comfortable doing in the past and toss out everything new. These exercises absolutely have stress built in. Don’t overtax yourself on top of it.

2. Right tools for the job. Consider how your tools served your goals here. Were you battling with the palette? The brushes? The lighting? Do you have a plan to address or alleviate such factors? The most common observation that people were messaging me about was, indeed, brush sizes. In the orientation, I offered up the heuristic, “Use the biggest brushes that you reasonably can.” Many found that the brushes they chose were far too small. Let’s look at a few reasons why a “too small” brush can be problematic here.

First, consider the level of resolution that you are abstracting to. Higher levels of abstraction mean less information and likely more “large” statements. Smaller brushes may give us an intuitive sense of greater control, but they actually can make your job far more difficult in this context. For example, let’s say you are laying in a relatively homogenous middle tone (with slight variation as light moves toward the shadow.) This might be communicated relatively simply with a few strokes done with a larger brush. However, the same task with a smaller brush can quickly introduce far more variations than what is desired. Additionally, the 5-stroke rules can put small brush users are a greater disadvantage as the same area covered in 5 strokes with your average size 6 bristle filbert might take 3 or 4 times that with a size 2.

Second, it is also important to acknowledge that smaller strokes push the artist to make smaller distinctions which can sometimes work against the effort to abstract. Believe it or not, I would argue that the size of the brush dictates, at least in part, the resolution of the observations being made. Simply speaking, put a small brush in your hand, and you will attend to small bits of information. Put a large brush in your hand, and you will attend to larger bits of information. So if you are engaged in significant abstraction, you are likely to find more success (generally speaking) in attending to larger, more global attributes than smaller (with exceptions, of course.) For better or worse—size matters here.

3. Lose that Notan; you’ll likely lose your form. Most representations begin with a simple separation of general light and dark. Many squint down at the subject, limiting incoming information to better observe this separation. A good example of a binary separation can be seen in the Japanese art of the “Notan.” Introduced to American art by Arthur Wesley Dow (1857 – 1922), among whose students was Georgia O’Keeffe, “notan” is a Japanese word for the interaction between dark and light. In 1899 Dow published a book, Composition: A Series of Exercises in Art Structure for the Use of Students and Teacher, that presented design as founded on three principles: line, color, and notan (notan meaning the massing of dark and light areas in a composition.)

Like the traditional Notan, the development stage that often follows the survey, outline, cartoon, or envelope involves a simplification of the subject by assigning different areas as either belonging to “light” or “shadow.” One tends to indicate shadows with a generally darker mass-in, while the exposed ground serves to indicate the light.

These two areas are then populated with additional values and colors that are intended to bring the representation into a closer kinship with the observed subject. However, this stage (following the notan-like separation) is where we can often betray our initial observed separation. Without going into to much detail about the “why,” I would just like to say that at any given time during the development of your subject—you should be able to squint and see the same general notan-like separation of light and dark that you may continue to observe in your subject. If you cannot squint and see it–you likely damaged the relationship by adding colors/values into the light that moved it closer to the dark or vice versa.

One common issue related to this is when the artist blocks in a general average or “local” color/value for the light or shadow and then adds or subtracts too much in one direction. To understand what I mean, imagine that you are painting an apple. You squint down and observe a general averaged “light” region that you indicate accordingly. Later, you want to add some indications of the surface texture by adding some strokes to indicate the light freckles on the apple that pepper the surface. However, when you start adding the light bits, you are changing the average of the initial averaged local, thus changing the relationship you indicated in the first place. If you start with an “average,” and you wish to increase resolution, you must do so by balancing light and dark additions to keep the average so it holds its relationship with other elements. If this sounds confusing, I can expand on the concept before we start painting on Thursday. Just let me know!

4. A Compositional Boundary Box. Artist Julie Beck asked me to share the reasons that we push artists to “square off” a composition for the challenges rather than just allowing unchecked vignetting. The main reason for this is to increase attention toward the importance of contextual information. I cannot stress enough that contextual information has an enormous impact on how we perceive colors, values, forms, and even entire subjects. Your subject and its surround go hand-in-hand. Unfortunately, for some, this context is sometimes viewed as little more than a decorative afterthought, leaving the majority of the attention placed within the subject’s contours. By promoting a boundary box for a composition that includes subject and contextual surround, one is more likely to assign increased attention to the surround that may serve to significantly improve the way in which the subject is communicated.

Ok, I think that’s enough info for this week. Take some time to consider these points and decide if any are applicable moving forward. Again, don’t try to change too much with what you are doing so as to overwhelm your process and derail your overall productivity. In addition, don’t be afraid to ask about any aspects of these challenges.

ALLA PRIMA GALLERY FOLDER FOR CHALLENGE #1:

https://www.dropbox.com/scl/fo/p8x6v6mwllvd9k5t41y28/AGyW4Qa69zLR-4Hp17Wwi6Y?rlkey=g6arwdo7gxp7auwc8tzh5b1i7&st=h385b615&dl=0

Again, any completed all prima exercise can be sent to: allaprimachallenges@gmail.com. We will add your effort to the appropriate Dropbox folder.

NEXT SESSION: JANUARY 30:

Challenge #2

IMPORTANT NOTICE: As mentioned in orientation, please direct all inquiries about the Alla Prima Challenges to: allaprimachallenges@gmail.com.

Ok, about this week’s challenge: Get your Feet Wet 2

The criteria for this week is simple─anything you like adhering to the following criteria:

Keep time to 30 minutes or under; limit yourself to 5 strokes before brush reload or void in non-homogenous areas (surveys and cartoons are exceptions as well.), and avoid premixing.

Again, anything you like─just try and have some fun.

RECAP FROM WEEK #1:

ANALYZE AND STRATEGIZE:

To make the most of these exercises, it is important to try and spend some time studying your own work and the efforts of the others in the group to build a strategy for growing success. Here are a few topics to think about when studying the efforts of Challenge #1 and strategizing for Challenge #2.

1. Small changes. When you are analyzing your work and planning for the next session, I would recommend limiting the number of changes you might make to your approach/process. I find, in general, 2 or 3 changes to your approach are more than enough to bring about a significant difference. If you start to change too much at once, assessing the impact of any one factor can become more difficult. In addition, in my experience, when people start to get frustrated, they tend to “run home to Mama.” This means that they will likely default to whatever they have been comfortable doing in the past and toss out everything new. These exercises absolutely have stress built in. Don’t overtax yourself on top of it.

2. Right tools for the job. Consider how your tools served your goals here. Were you battling with the palette? The brushes? The lighting? Do you have a plan to address or alleviate such factors? The most common observation that people were messaging me about was, indeed, brush sizes. In the orientation, I offered up the heuristic, “Use the biggest brushes that you reasonably can.” Many found that the brushes they chose were far too small. Let’s look at a few reasons why a “too small” brush can be problematic here.

First, consider the level of resolution that you are abstracting to. Higher levels of abstraction mean less information and likely more “large” statements. Smaller brushes may give us an intuitive sense of greater control, but they actually can make your job far more difficult in this context. For example, let’s say you are laying in a relatively homogenous middle tone (with slight variation as light moves toward the shadow.) This might be communicated relatively simply with a few strokes done with a larger brush. However, the same task with a smaller brush can quickly introduce far more variations than what is desired. Additionally, the 5-stroke rules can put small brush users are a greater disadvantage as the same area covered in 5 strokes with your average size 6 bristle filbert might take 3 or 4 times that with a size 2.

Second, it is also important to acknowledge that smaller strokes push the artist to make smaller distinctions which can sometimes work against the effort to abstract. Believe it or not, I would argue that the size of the brush dictates, at least in part, the resolution of the observations being made. Simply speaking, put a small brush in your hand, and you will attend to small bits of information. Put a large brush in your hand, and you will attend to larger bits of information. So if you are engaged in significant abstraction, you are likely to find more success (generally speaking) in attending to larger, more global attributes than smaller (with exceptions, of course.) For better or worse—size matters here.

3. Lose that Notan; you’ll likely lose your form. Most representations begin with a simple separation of general light and dark. Many squint down at the subject, limiting incoming information to better observe this separation. A good example of a binary separation can be seen in the Japanese art of the “Notan.” Introduced to American art by Arthur Wesley Dow (1857 – 1922), among whose students was Georgia O’Keeffe, “notan” is a Japanese word for the interaction between dark and light. In 1899 Dow published a book, Composition: A Series of Exercises in Art Structure for the Use of Students and Teacher, that presented design as founded on three principles: line, color, and notan (notan meaning the massing of dark and light areas in a composition.)

Like the traditional Notan, the development stage that often follows the survey, outline, cartoon, or envelope involves a simplification of the subject by assigning different areas as either belonging to “light” or “shadow.” One tends to indicate shadows with a generally darker mass-in, while the exposed ground serves to indicate the light.

These two areas are then populated with additional values and colors that are intended to bring the representation into a closer kinship with the observed subject. However, this stage (following the notan-like separation) is where we can often betray our initial observed separation. Without going into to much detail about the “why,” I would just like to say that at any given time during the development of your subject—you should be able to squint and see the same general notan-like separation of light and dark that you may continue to observe in your subject. If you cannot squint and see it–you likely damaged the relationship by adding colors/values into the light that moved it closer to the dark or vice versa.

One common issue related to this is when the artist blocks in a general average or “local” color/value for the light or shadow and then adds or subtracts too much in one direction. To understand what I mean, imagine that you are painting an apple. You squint down and observe a general averaged “light” region that you indicate accordingly. Later, you want to add some indications of the surface texture by adding some strokes to indicate the light freckles on the apple that pepper the surface. However, when you start adding the light bits, you are changing the average of the initial averaged local, thus changing the relationship you indicated in the first place. If you start with an “average,” and you wish to increase resolution, you must do so by balancing light and dark additions to keep the average so it holds its relationship with other elements. If this sounds confusing, I can expand on the concept before we start painting on Thursday. Just let me know!

4. A Compositional Boundary Box. Artist Julie Beck asked me to share the reasons that we push artists to “square off” a composition for the challenges rather than just allowing unchecked vignetting. The main reason for this is to increase attention toward the importance of contextual information. I cannot stress enough that contextual information has an enormous impact on how we perceive colors, values, forms, and even entire subjects. Your subject and its surround go hand-in-hand. Unfortunately, for some, this context is sometimes viewed as little more than a decorative afterthought, leaving the majority of the attention placed within the subject’s contours. By promoting a boundary box for a composition that includes subject and contextual surround, one is more likely to assign increased attention to the surround that may serve to significantly improve the way in which the subject is communicated.

Again, the are the same notes and considerations from last week but still, take some time to consider these points and decide if any are applicable moving forward. Again, don’t try to change too much with what you are doing so as to overwhelm your process and derail your overall productivity. In addition, don’t be afraid to ask about any aspects of these challenges.

Drop Box for this week:

https://www.dropbox.com/scl/fo/3k0ku2kfe6oxrarupkvf4/AHF-NaqgK5YLxEubwXg4x9o?rlkey=9qt4oyq8mngawr9nt5z8tnavf&st=o7at37gy&dl=0

Again, any completed all prima exercise can be sent to: allaprimachallenges@gmail.com. We will add your effort to the appropriate Dropbox folder.

NEXT SESSION: FEBRUARY 6:

Challenge #3

IMPORTANT NOTICE: As mentioned in orientation, please direct all inquiries about the Alla Prima Challenges to: allaprimachallenges@gmail.com.

Ok, about this week’s challenge: High-Chroma Complements

While the first two sessions were nearly identical in criteria—allowing you to better appreciate and evaluate the effectiveness of any procedural or conceptual changes you wanted to implement—this week shifts gears significantly. Be prepared for some potential “turbulence.” The name for this week’s challenge comes from the number of restrictors defining the session (along with the fact that we often took part in the challenges on Thursdays here at the Academy).

High Chroma Complements:

  1. The composition must include a relatively high-chroma subject or subjects set against a high-chroma background which is the complementary color of the subject’s local. (For example, a bright orange object against a cool blue background or a vivid red against a rich green.)
  2. Standard restrictions remain: 30-minute time limit / No premixing.
  3. 5-stroke palette draw rule in effect.

Why Work Within These Restrictions?

While the standard time limit, palette draw rule, and premixing restrictions have already been explained in detail, let’s address the use of “chroma” and “complementary colors” here.

Complementary Color Interaction

This restriction forces us to consider several factors—some of which we might otherwise overlook in our day-to-day work. First, we must think about the behavior of the actual paints themselves. How do complementary colors interact when placed side by side? What happens when they are both intentionally and unintentionally mixed?

First, let’s look at what we are actually talking about…

High Chroma: To appreciate the concept of chroma, it is important to understand what a color is. Color is a particular set of visual experiences that can be described by assigned attributes of hue, value (lightness/brightness), and chroma (saturation.) The attribute of Chroma is the perceived purity or intensity of a specific color. It can also be described as the manner in which the color appears to differ from a neutral gray of the same value. Again, related terms like ‘Saturation’ or ‘Intensity’ may be used to sometimes refer to chroma in an extremely general way. If the Chroma is low then the color will appear more gray. If the chroma is high, the color will appear intense (less gray). Do not confuse chroma with value; you can make a color more gray without making it darker or lighter. You can affect the chroma of any color by mixing it with any the color. In almost every case the Chroma of a color will lower when the color is mixed with another. Here’s a chart that illustrates the concept of how value can differ from chroma:

Complementary Color: Within the realm of color wheels, complementary colors are the colors that sit opposite to each other on the color wheel. A more “conceptual” aspect of these colors is that when mixed, they will yield an “ideal neutral” in a path that is more direct than a mixture with any other color on the perimeter of a gamut.

Here’s a graphic that will help you to understand the concept in the context of an RYB (Categorical Red-Yellow-Blue-as-primary) color wheel:

Most artists have, at some point, struggled with the effects of maintaining or mixing complementary colors—whether it’s a categorical red and green, blue and orange, or yellow and purple. When subtractively mixed in balanced parts, they tend to significantly neutralize one another, producing desaturated or muddy tones rather than vibrant color interactions. Even slight contamination can significantly alter a mixture, creating hues that may not seem to belong within the context of the painting. This phenomenon can be extremely useful in an exercise focused on developing precision, control, and strategic application.

For this session, you’ll need to be highly deliberate about where and how your paint is applied. The risk of contamination will be high throughout most of the exercise. This means you must find advantages in brush placement, pressure, stroke order, and tracking which brushes have been contaminated with which colors. I’ve seen far too many artists accidentally grab the wrong brush and start a cascade of unintended color mixing—leading straight to “mud town.”

Strategies for Success

Beyond careful brushwork, how else can we ensure successful execution? First, we must carefully select our pigments and consider the order in which colors are applied. The first strokes of a painting often define its underlying structure, so ask yourself: What color will best serve as my initial sketch? The right choice can either minimize unintended mixing or contribute beneficially to subsequent layers.

This is where the concept of a color buffer, bridge, or chromophage (a color that “neutralizes” or counteracts an unwanted cast) comes into play. For example, if working with an orange subject against a blue background, an initial sketch in a slightly warm, reddish hue might help counteract any unintended greenish tones that could emerge from later interactions between blue and orange.

Choosing the Right Complements

What actual colors should we use to represent our subject and background? While we often think of complementary color pairs in a broad sense—red/green, blue/orange, yellow/purple—each of these combinations holds numerous variations, and the specific pigments chosen can have a significant impact on mixing behavior.

For instance, if creating a red-green composition, a cadmium red mixed with a phthalo green will yield a very different neutral than alizarin crimson mixed with viridian. Similarly, the type of blue chosen for an orange subject can determine whether the final composition leans toward cooler or warmer tones. When painting an area that needs to be represented by a dark neutral (or what we might colloquially call “black”), it’s essential to consider nearby colors and how they interact before deciding on the specific components of that dark mixture.

By approaching this exercise with strategic planning and heightened awareness of complementary color relationships, you’ll gain greater control over color mixing, application precision, and the overall impact of your compositions.

Looking forward to it!

ALLA PRIMA GALLERY FOLDER FOR CHALLENGE #3:

https://www.dropbox.com/scl/fo/78iesdtw48d45wrrnorcj/AIq16_ewn4hYF47OGtx8OTA?rlkey=l4pvpqyq3us3fj8o15cceg6y7&st=1lgqmg3j&dl=0

Again, any completed all prima exercise can be sent to: allaprimachallenges@gmail.com. We will add your effort to the appropriate Dropbox folder.

NEXT SESSION: FEBRUARY 13:

IMPORTANT NOTICE: As mentioned in orientation, please direct all inquiries about the Alla Prima Challenges to: allaprimachallenges@gmail.com.

This week’s challenge: Rock, Paper, Scissors

As most of you have come to understand, our Alla Prima challenges can be an exhilarating exercise of somewhat speedy abstraction. Our time constraints aim to push artists to address how they prioritize composition, general form, and “essence” over “finer” aspects of representation, like the certain small-scale details we often associate with communicating surface textures. In fact, during these brief torrents of abstraction, very often, high-resolution elements (high-spatial frequency information) are lost in the blink of an eye (or rather a quick strategic squint!)

In this special challenge, “Rock, Paper, Scissors,” practitioners must challenge their own process of abstraction to communicate texture without implementing that small-scale information that we all rely on so often to “sell a surface.” And as you have come to expect with our challenges–we don’t require just ONE texture to be handled during this week’s effort—but three distinct ones!

Rock, Paper Scissors:

  1. The composition must include 3 distinct, discrete implied surface textures.
  2. Additional restrictions : 40-minute time limit / No premixing.
  3. 5-stroke palette draw rule in effect.

Participants must create a painting that clearly and deliberately represents three discrete textures. The textures chosen should be visually distinct from each other (as our title suggests)—such as the rough, weathered surface found on a rock, the smooth, diffused surface of a piece of paper, and the polished reflective metal that can be found with of a pair of scissors.

Obviously, the goal here is to challenge our excessive reliance on fine detail in this textural effort, which must often be sacrificed in the pursuit of abstraction and simplification.

Let’s clarify a few terms for our focus this week:

Detail:

In the realm of visual art, detail refers to any subordinate visual element within a composition that contributes to refinement, complexity, or specificity. While often smaller in scale, details may also manifest through variations in texture, value, edge quality, or intricate forms, enhancing the clarity, depth, or expressive intent of a work. Detail can also be understood in terms of high-spatial frequency information—areas of an image that contain rapid changes in visual data, such as fine lines, sharp transitions, or densely packed textures. These high-frequency elements create a sense of sharpness and intricacy, contrasting with lower-frequency areas that provide broader forms and softer transitions.

Implied Surface Texture (Visual) & Its Relationship to Detail

Generally speaking, surface texture refers to the local deviation of a surface from a perfectly flat plane. This is somewhat similar to how chroma can be understood as a perceptible deviation from a neutral with a fixed hue and value. Surface texture, in a general context, represents a perceptible departure from smoothness, influencing both visual and tactile perception. These deviations can manifest as roughness, glossiness, softness, or other material qualities, physically (in three-dimensional works) or through implied texture in a two-dimensional representation."

Implied texture is the visually suggested surface quality of an object within a two-dimensional image, created through variations in high- and low-spatial frequency information, simulated reflectance qualities, controlled value structures, edge relationships, and mark-making strategies. Unlike actual texture, which can be physically felt, implied texture relies on optical cues such as contrast, directional lighting, and local patterning to evoke the perception of roughness, smoothness, glossiness, or other material characteristics.

In many contexts, I often use detail to specifically describe elements of surface texture, but visual (implied) surface texture and detail are actually different things.

  • Detail is often associated with high-spatial frequency information—small-scale elements that contribute to refinement, intricacy, and specificity in an image.
  • Surface texture, by contrast, is more about the broader tactile or material qualities of a form, focusing on how light interacts with the surface rather than being defined strictly by high-spatial frequency information or small-scale, subordinate information.
  • Detail is localized and often object-specific, whereas surface texture can be more generalized, affecting an entire area of a composition.
  • Artists may use fine detail to create the illusion of surface texture, but surface texture can also exist independently of high-detail rendering (e.g., a painterly, expressive approach that suggests texture without minute refinements).

A Few Key Considerations:

Most painters associate texture with “detail,” assuming that more intricate, higher-resolution information is the key to communicating a certain material or surface’s texture. However, texture can be absolutely be communicated with lower-resolution (lower spatial frequency) information quite successfully. Strategic color/value structures, edge variation, and brushwork can all contribute to effectively communicating texture and material quality without the artist having to bust out those triple-zero detail brushes!

Here are a few considerations to help you strategize on how you might use such components:

  • How light (and shadow) interact with, and ultimately communicate, different types of surfaces to us.
  • How might edges or edge variations contribute to our expression or perception of material qualities and surface texture?
  • How might brushstrokes and different paint applications contribute to a successful communication of surface quality?
  • How might the context/surrounding elements influence how certain textures are communicated/perceived?

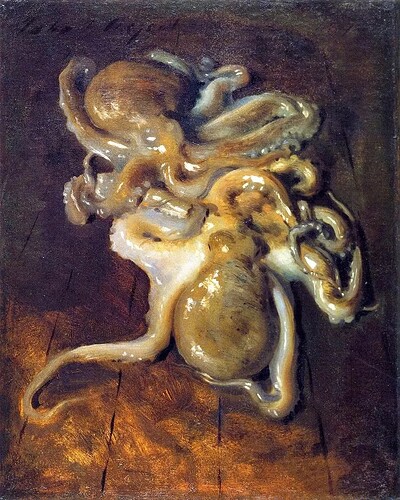
Here’s one of my favorite “implied textural” works that does effectively communicates surface texture without too much reliance on extensive small scale, high-spatial information (details.)


Two octopus by John Singer Sargent, Oil, 1875, 40.6×32.1 cm

The “Rock, Paper, Scissors” challenge asks artists to rethink how they approach texture, particularly under alla prima conditions where the abstraction and brushwork economy significantly define the landscape. By integrating three distinct textures here and restricting our efforts to our alla prima dynamic, hopefully, practitioners can better evaluate their ability to suggest complexity through simplicity. In doing so, they will strengthen their overall command of paint application, visual perception, and abstraction—essential skills for just about any representational painter.

Are you ready to put your alla prima skills to the test? Choose your textures, pick up your brush, and let the challenge begin!

ALLA PRIMA GALLERY FOLDER FOR CHALLENGE #4:

https://www.dropbox.com/scl/fo/tjljzv9jm09fttid85n2f/AMnVUIfScZwIprV68_TUgyw?rlkey=btl2th4k4tbnwtxun60us8t36&st=3807t8se&dl=0

Again, any completed all prima exercise can be sent to: allaprimachallenges@gmail.com. We will add your effort to the appropriate Dropbox folder.

1 Like

NEXT SESSION: FEBRUARY 20:

IMPORTANT NOTICE: As mentioned in orientation, please direct all inquiries about the Alla Prima Challenges to: allaprimachallenges@gmail.com.

This week’s challenge: Monochrome(ish) Madness!

Greetings painters! This week, the Alla Prima Challenge series II schedule has us losing a dimension of potential contrast–hue. In this week’s challenge, “Monochrome(ish) Madness!,” practitioners must limit their composition to subjects and environments that all share the same general or “local” hue (you can get an idea for this in the lead image this week.) This potential contrast limitation will urge practitioners to rely more on the contrast potential within the value and chroma dimensions of color. The “ish” in the title is the recognition that even though all of the “locals” will categorically share the same local hue—it is highly likely that artists will need to introduce many other colors to their painting so as to effectively communicate the generally homogenous hue appearance through the mechanisms of subtractive mixing. This latter issue should help impress upon each participant the importance of understanding that our perceptions of color in the contexts of light falloff and occlusions in illumination do not often “map” onto any type of straightforward subtractive color mixture.

Monochrome(ish) Madness:

  1. All subjects and surround must be of the same “local” hue.
  2. Additional restrictions : 30-minute time limit / No premixing.
  3. 5-stroke palette draw rule in effect.

One of the biggest takeaways from this challenge is for artist’s to better appreciate that the the realm of color in representational works it rarely straightforward. Here, again, a subject that can be described as having a single local hue (imagine a fairly homogenous orange) does not mean that one’s painting will be comprised of only paints of that general hue. In other words, a representation of an orange on an orange surface w/ surround will likely not be done with only orange paints. Many more colors may be required in mixing and surface arrangement to effectively communicate our perception of the scene.

As with our other challenges, this exercise also limits freedom in a dimension so as to allow artists to more more on the potential of the dimensions that remain. Here, aside from a color strategy that may not be straightforward, artists much also try to push contrasts in value, chroma and even other aspects like edge control to achieve the same successful results they always aim for.

Lastly, I believe this challenge does better prepare observational representationalists for many real-world painting situations where lighting conditions, atmospheric effects, and surface interactions can naturally reduce hue contrast, forcing artists to communicate form and depth through other means. Learning to manipulate these subtleties can make an artist’s work more sophisticated, controlled, and visually cohesive.

Let’s clarify a few terms for our focus this week:

Hue is the perceptual attribute (or dimension) of color that allows it to be classified as red, yellow, green, blue, or any intermediary color between these categories. In technical terms, hue is a function of wavelength composition within the visible spectrum, typically measured in nanometers (nm), where different wavelengths correspond to different color perceptions—approximately 400 nm for violet to 700 nm for red.

Unlike chroma (saturation), which refers to the intensity or purity of a color, and value (brightness), which refers to lightness or darkness, hue strictly refers to the categorical aspect of color, independent of its intensity or luminance. This image communicates changes in value and chroma while maintaining a single hue.

Monochrome?Monochromatic refers to a color scheme or visual composition that is derived from a single hue and its variations in value (lightness/darkness) and chroma (saturation/intensity). Contrary to the common misconception that monochrome is synonymous with a black-and-white (achromatic) scheme, a monochromatic composition can include a full range of values and chromatic intensities within a single hue family.

Monochrome can also been viewed as hue constancy, meaning all colors present share the same dominant spectral identity but may vary in luminance and purity due to subtractive or additive mixing, lighting conditions, or material properties.

While achromatic (grayscale) images are technically a subset of monochrome, they differ in that the hue dimension may difficult to discern. In contrast, a monochromatic image in a hue-based system (such as the HSL or HSV color models) includes tints (hue + white), tones (hue + gray), and shades (hue + black), all maintaining the same spectral base.

Tips for Success

Show up with a full Palette! – As I’ve stated earlier here, even though we have a monochrome(ish) composition, we might need every color in our arsenal to communicate it!

Don’t be afraid to Really Push Value and Chroma Changes – Since hue contrast is minimized, ensure your composition takes advantage of a broad spectrum of darks and lights to maintain depth and separation.**

Use the colloquial concept of Temperature Shifts to your Advantage! – Small shifts in “warm and cool” variations while remaining tethered to a categorical hue family can add dimensionality and realism without breaking the monochromatic “whole.”**

Mind your edges – Lost and found edges can also play a critical role in defining volume or form when hue variation is limited.

Get ready to put your alla prima skills to the test once again? I hope so!

ALLA PRIMA GALLERY FOLDER FOR CHALLENGE #5:

https://www.dropbox.com/scl/fo/2fk1ig3ql0fyfqvo10o1j/AO0Wl8XD39q7fklHm5HxL78?rlkey=kobmhzgckcgzea929a668sfg8&st=988qj5mz&dl=0

Again, any completed all prima exercise can be sent to: allaprimachallenges@gmail.com. We will add your effort to the appropriate Dropbox folder.

1 Like

NEXT SESSION: FEBRUARY 27:

IMPORTANT NOTICE: As mentioned in orientation, please direct all inquiries about the Alla Prima Challenges to: allaprimachallenges@gmail.com.

This week’s challenge: Radical Botanicals

Exploring the Balance Between Novelty and Familiarity

This week’s alla prima challenge, Radical Botanicals, invites artists to push beyond their usual subjects and incorporate at least one exotic or uncommon botanical element into their compositions. Whether it’s a rare tropical flower, an unfamiliar succulent, or an unusual leaf structure, the goal is to break away from the comfort of well-trodden imagery and engage with a subject that challenges both perception and execution.

However, this challenge isn’t just about painting something new—it’s about exploring the delicate balance between novelty and familiarity.

Radical Botanicals:

  1. Composition must include one exotic or less-than-common (for the artist) botanical subject.
  2. Additional restrictions : 30-minute time limit / No premixing.
  3. 5-stroke palette draw rule in effect.

The Science Behind Aesthetic Engagement

Aesthetic responses are deeply intertwined with cognitive and perceptual fluency. That is, we tend to find things visually pleasing when they are easy for us to process. This is why the familiar often feels right—it fits into our existing visual and conceptual frameworks without friction. However, excessive familiarity can lead to habituation, where something once beautiful becomes mundane and unengaging.

On the other hand, when we encounter something highly novel, it may be intriguing but also cognitively demanding. If the novelty is too overwhelming—too foreign or chaotic—it can result in disengagement rather than fascination. The trick, then, is to find the sweet spot where novelty is compelling but still digestible.

A Heuristic for Balance

One useful way to strike this balance is by thinking about the composition in terms of the whole versus its components. For example:

  • If the overall subject is highly novel—say, a bizarrely structured flower or an unfamiliar plant—then grounding the composition in familiar visual conventions (lighting, perspective, color harmony) can make it more accessible.
  • If the subject is quite conventional—like a well-known flower or common foliage—then introducing novel components (unexpected cropping, bold abstraction, unique color schemes) can breathe new life into it.

This approach ensures that while the work may be somewhat fresh and interesting, it also remains readable and engaging for both the artist and the viewer.

Navigating the Challenge: Recognition Must Survive Abstraction

Radical Botanicals is uniquely difficult because it intersects with another core theme of this series: recognition must survive abstraction. By choosing an uncommon botanical subject, artists must still ensure that their abstraction or stylization assists recognition instead of diminishing it.

Walking the tightrope between novelty and convention in this way is an invaluable exercise in visual communication. The artist must decide: How much can I push this form, color, or texture before it loses its recognizable essence?

Final Thoughts

This week’s challenge is an opportunity to expand your visual vocabulary, experiment with new forms, and explore the psychological impact of novelty and familiarity in art. By thoughtfully integrating an exotic botanical subject into your composition, you’ll not only grow technically but also refine your ability to engage the viewer in a way that is both intriguing and accessible.

So find a plant you’ve never painted before, embrace the unfamiliar, and let’s see how radical your botanicals can be!

ALLA PRIMA GALLERY FOLDER FOR CHALLENGE #6:

https://www.dropbox.com/scl/fo/qgdbyf0gxswdirhs8tdga/APL0jGNYEDeRctHRhTWMgG8?rlkey=wf8vtrxy2a9fduyeo1v88lfyy&st=c5esn27b&dl=0

Again, any completed all prima exercise can be sent to: allaprimachallenges@gmail.com. We will add your effort to the appropriate Dropbox folder.

EXTRAS: We spoke about two really cool botanical-themed subjects during the session today. One was the famous Corpse Flower.

The other thing mentioned was the famous Poison Garden in North England housed within the Alnwick Garden. It boasts over 100 “infamous killer” plants!

NEXT SESSION: MARCH 6:

IMPORTANT NOTICE: As mentioned in orientation, please direct all inquiries about the Alla Prima Challenges to: allaprimachallenges@gmail.com.

This week’s challenge: Loose Cannons

Loose Cannons: Breaking Canonical Perspective

This week’s alla prima challenge, Loose Cannons, builds on the principles explored in Radical Botanicals, pushing artists to further refine their ability to balance novelty and familiarity. Instead of introducing unfamiliar subjects, this challenge requires artists to depict familiar objects but from non-canonical perspectives—viewpoints that deviate from the most recognizable and easily processed angles.

By deliberately orienting the subject in an unusual manner, we create an opportunity to investigate how recognition survives abstraction. This is an essential skill for any artist, as representational accuracy is not just about what is depicted, but how it is perceived and interpreted by the viewer.

Loose Cannons:

  1. Any familiar object, but from a non-canonical perspective.
  2. Additional restrictions : 30-minute time limit / No premixing.
  3. 5-stroke palette draw rule in effect.

Understanding Canonical Perspective

Stephen Palmer’s Vision Science: Photons to Phenomenology provides key insights into why some orientations of objects feel more “natural” than others. A canonical perspective is the most typical or easily recognized viewpoint of an object. It is the view from which an object’s essential structural and functional properties are most clearly communicated.

  • A canonical view of a cup, for instance, would likely be from a slight angle that allows both the handle and the opening to be seen.
  • A shoe is most recognizable from a side view rather than directly above or below.
  • Faces are most often recognized from a three-quarter or frontal view rather than an extreme tilt or an upside-down position.

This preference arises from the brain’s reliance on categorization theory and perceptual fluency. When we see objects from a canonical perspective, they match our stored mental representations of those objects, making them easier to process and recognize​.

Non-canonical perspectives disrupt this ease of recognition, forcing the brain to work harder to match the observed form with stored representations. This effort can lead to either enhanced engagement or cognitive overload, depending on the level of distortion and the viewer’s familiarity with the subject​. This is not a bad thing per se, as non-canonical perspective can be used to add much drama to a composition.

Here are two sets of images from Stephen. E. Palmer’s Vision Science: Photons to Phenomenology. The left indicates the “Canonical Perspectives” for common objects as demonstrated in research studies. On the right, amount of latency in recognition/identification for a horse.

How about these images of a skull? Which orientations do you think would be quickest to find recognition. Which would be the slowest?


Strategic Use of Non-Canonical Views in Representation

Since canonical perspectives are so cognitively efficient, artists must approach non-canonical orientations strategically to ensure that the subject remains identifiable while still introducing novelty.

  1. Subtle Deviations
  • Slight tilts or shifts in perspective can create a sense of dynamism while maintaining legibility.
  • A slight top-down or bottom-up view can add intrigue without completely obscuring key features.
  1. Contextual Cues
  • If the subject is placed in an extreme angle, surrounding elements (cast shadows, reflections, secondary objects) can reinforce its identity. For example, think of looking down at a bicycle from above. It might be difficult to discern what it is at first–BUT, if it illuminated in a way where its projected shadow can offer more insight as to its structure–we would likely recognize it more quickly.
  • Color, texture, and lighting can compensate for the loss of standard shape cues.
  1. Recognition Through Structure
  • If an object is rotated, it’s crucial to retain proportional relationships between key features.
  • Recognizable negative space and internal patterns help anchor recognition despite perspective shifts.

Final Thoughts

By confronting the challenge of Loose Cannons, artists refine their ability to navigate abstraction without sacrificing too much recognition. This exercise also tests an artist’s ability to more deliberately influence viewer perception, ensuring that even in altered perspectives, clarity and engagement are maintained.

Approach this challenge with intent: push the boundaries of perception, but always with the goal of maintaining a legible, engaging image. How far can you stretch perspective before recognition begins to slip?

Let’s find out.

ALLA PRIMA GALLERY FOLDER FOR CHALLENGE #7:

https://www.dropbox.com/scl/fo/69jo2qnid8up66l288qkt/ANYJ1Gx3LDtB4jvgTZncSsY?rlkey=u7v0edi5tbg23vva1gcyo3ce1&st=da9k8ksq&dl=0

Again, any completed all prima exercise can be sent to: allaprimachallenges@gmail.com. We will add your effort to the appropriate Dropbox folder.

NEXT SESSION: MARCH 13:

IMPORTANT NOTICE: As mentioned in orientation, please direct all inquiries about the Alla Prima Challenges to: allaprimachallenges@gmail.com.

This week’s challenge: Grey Matter

Grey Matter: Seeing Color in Black and White

This week’s alla prima challenge, Grey Matter, delves into the profound influence of hue and chroma on our perception of lightness (value). Unlike previous challenges that tested recognition through unconventional perspectives or limited contrast, this exercise delivers a direct challenge—artists must depict subjects typically associated with high chroma colors, but with chroma so low that hue is no longer discernible (essentially grayscale). This forces us to sharpen our focus on how recognition persists when a primary identifier (here-hue and chroma), is seemingly stripped away!

Grey Matter:

  1. The composition must include a subject that is “essentially” high chroma**—(an object strongly associated with vivid color (e.g., a red apple, a bright yellow banana or a rubber duck, etc.)) and be represented in grayscale.
  2. Palette Restriction: Only one black and one white.
  3. Additional restrictions : 30-minute time limit / No premixing.
  4. 5-stroke palette draw rule in effect.

While we are not truly “removing” color—since black, white, and grey are colors—we are working within a low-chroma framework where hue identification becomes significantly diminished. This forces us to rely on other visual mechanisms to preserve recognition and clarity.

Compensating for the Loss of Discernible Hue

Since color is often a primary cue for object identification, working within this low-chroma range requires strategic compensation. Here are some ways to maintain recognition despite the absence of strong chroma:

  • Lighting & Value Contrast:
    • Strong, directional lighting can help define form, enhancing depth and texture.
    • Maximizing contrast between light and shadow helps maintain the sense of dimension.
  • Canonical Perspective:
    • Since we are already minimizing chroma, using a familiar viewpoint helps retain recognition.
    • A top-down view of a lemon may be less effective than a slight angle that still reveals the contour and form we associate with the fruit.
  • Contextual Cues:
    • Shadows, reflections, and surrounding elements can reinforce the subject’s identity.
    • A rose without its characteristic red hue may still be recognizable if its petal structure and surrounding leaves are clearly defined.
  • Texture & Pattern Recognition:
    • The distinctive surface of an orange, the glossy reflection of a cherry, or the ridges of a bell pepper can act as powerful identity markers.

The Helmholtz–Kohlrausch Effect: Hue and Chroma’s impact on Value Perception

One of the most fascinating perceptual phenomena at play in this challenge is the Helmholtz–Kohlrausch effect. This effect describes how some highly saturated colors appear to be inherently “brighter” than less saturated ones, even when their luminance (physical brightness) is the same.

Helmholtz–Kohlrausch effect:

Each color on top has approximately the same lightness level and yet they do not appear equally bright. The yellow sample (second from the left) appears to be much dimmer than the magenta (right-most) one. However, when the top image is converted to grayscale, we have the image on the bottom–a single shade of gray.

For example:

  • A neon green object will seem more luminous than a dark red object, even if both are measured to reflect the same amount of light.
  • When chroma is significantly lowered, objects that rely on chroma for their sense of brightness will suddenly appear duller or darker than expected.

How does this affect our challenge?
If an object “feels” bright to us because of its chroma, we may need to increase its value in grayscale to match how we perceive it in full color. However, keep in mind that such compensation may carry an impact on value relationships and a developing context. For instance:

  • A bright blue sky, when desaturated, might translate to a mid-value gray rather than the lighter tone our brain associates with “bright.”
  • A vivid yellow object, despite its high chroma, might need to be pushed toward a higher grayscale value to compensate for its perceived brightness in color.

Final Thoughts

This challenge forces artists to think critically about how we perceive color, light, and form. It’s an opportunity to develop a stronger understanding of value structures and perceptual compensation—two essential skills in both grayscale and full-color work.

Approach this exercise with intent: What adjustments must be made to maintain the identity of your subject? How can you translate chroma-driven lightness or brightness into an effective grayscale image?

Let’s see how far we can push our abilities in low-chroma space.

ALLA PRIMA GALLERY FOLDER FOR CHALLENGE #8:

Again, any completed all prima exercise can be sent to: allaprimachallenges@gmail.com. We will add your effort to the appropriate Dropbox folder.

In talking about the A1 problem during our session I wanted to show you how Photoshop “weights” the greyscale to align more with human perception. Notice how much closer mine is to this weighted version.

Two different routes shown here:

1. Converting Mode to Grayscale (Image > Mode > Grayscale)

  • What Happens?
    • Photoshop removes all color information and converts the image to shades of gray. This is not an even desaturation—instead, it applies a weighted conversion based on how the human eye perceives color. Because our eyes are more sensitive to green, it weights the RGB values differently:

      • Red = ~30%
      • Green = ~59%
      • Blue = ~11%
    • This means greenish areas will appear lighter and bluer areas will appear darker compared to an unweighted desaturation.


2. Desaturating via Hue/Saturation (Image > Adjustments > Hue/Saturation > Drop Saturation to -100)

  • What Happens?
    • Unlike the weighted grayscale mode, this method equally removes saturation from all colors.
    • Since it’s not weighted, reds, blues, and greens contribute equally to the final grayscale values, often resulting in significantly different relationsships when compared with Grayscale Mode conversion.

Comparison

Method Effect
Mode Change (Grayscale) Weighted conversion based on human vision (green is brighter, blue is darker)
Hue/Saturation (-100 Saturation) Unweighted desaturation

NEXT SESSION: MARCH 20:

IMPORTANT NOTICE: As mentioned in orientation, please direct all inquiries about the Alla Prima Challenges to: allaprimachallenges@gmail.com.

This week’s challenge: Getting Baked!

Getting Baked!: Synthesizing Lessons from (Nearly) the First Half

This week’s alla prima challenge, Getting Baked!, serves as a near-the-halfway point “checkpoint” in our 20-week journey, offering a break from more stringent constraints while encouraging artists to integrate the skills developed thus far. Unlike previous challenges that imposed dramatic limitations on the palette, pictorial elements, or subject constraints, this week allows for a broader range of decision-making—providing a real-time test of your developing adaptability and efficiency. By tackling a baked subject with our standard restrictions, participants must balance deliberate color selection, economy of brushwork, and efficient time management with a potential urge to devour the subject, LOL! Seriously though-- Even without our recent additional restrictions, don’t forget the importance of strategic planning and execution, ensuring that recognition survives abstraction!

Getting Baked!:

  1. The composition must include a baked subject. (bread, cupcake, etc.)
  2. Palette Restrictions: None.
  3. Additional restrictions : **30-minute time limit
  4. No premixing.**
  5. 5-stroke palette draw rule** in effect.

The Role of Baked Goods in Painting: A Historical Walkthrough

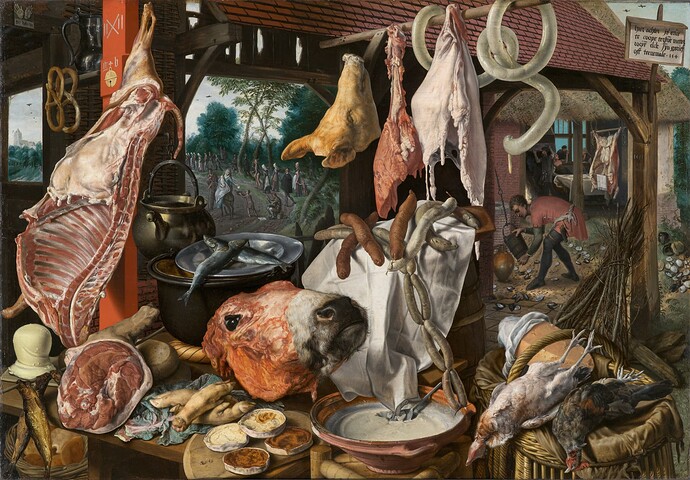
Baked goods have been a recurring motif in painting throughout history, serving as symbols of abundance, mortality, domesticity, and ritual. Whether depicted in lavish Baroque still lifes or modern impressionistic compositions, bread and other baked goods often carried deeper cultural, religious, or philosophical meanings. Below is an exploration of notable examples across different historical periods and artistic styles, along with an examination of their significance.

1. The Late Gothic and Early Renaissance (14th–15th Century)

Symbolic and Religious Representations

During the late Gothic and early Renaissance periods, bread often appeared in religious paintings, particularly in scenes of The Last Supper or depictions of Christ breaking bread. The Eucharistic symbolism of bread as the body of Christ made it a key element in Christian iconography.

2. The Dutch Golden Age (17th Century)

Vanitas and the Fleeting Nature of Life

Still-life painting flourished in the Netherlands during the 17th century, and bread often appeared alongside fruit, fish, and wine in “banquet pieces” or vanitas paintings—artworks that reminded viewers of the transience of life.

3. Rococo and Neoclassicism (18th Century)

Domestic Comfort and the Rise of Bourgeois Tastes

In the 18th century, as European society saw shifts in wealth distribution and domestic life, paintings began to emphasize everyday pleasures, including food.

4. 19th Century Realism and Impressionism

Everyday Life and the Ephemeral

As artists moved away from idealized subjects, they increasingly depicted the realities of daily life. Bread remained a common subject, often as a symbol of labor, sustenance, or fleeting moments of pleasure.

5. 20th Century Modernism and Beyond

Symbolism, Experimentation, and Social Commentary

In the 20th century, artists experimented with form and meaning, using baked goods in unexpected ways.

  • Pablo Picasso, Still Life with Bread and Fruit Dish (1908–1909)

    • A Cubist deconstruction of traditional still-life elements.
    • Reinvents how we perceive ordinary objects in space.
  • Salvador Dalí, Anthropomorphic Bread (1932)

    • A surrealistic transformation of bread into a strange, distorted entity.
    • Explores themes of decay, desire, and subconscious imagery.
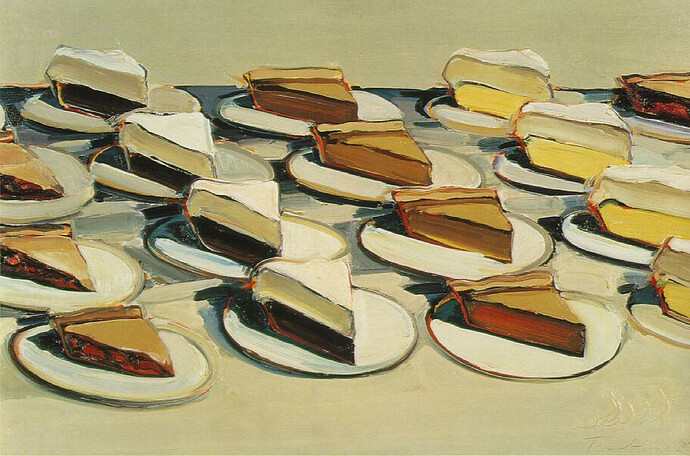
  • Wayne Thiebaud, Pies, Pies, Pies (1961)

    • A Pop Art celebration of commercialized food culture.
    • Emphasizes color, repetition, and the nostalgic appeal of baked goods.

In Summary

From religious symbolism in the Renaissance to the commercial aesthetics of Pop Art, baked goods have played a dynamic role in painting across centuries. Whether as a representation of faith, wealth, domesticity, or artistic innovation, they continue to provide rich visual and conceptual material for artists. This week’s alla prima challenge is an opportunity to engage with this tradition, applying modern techniques to a timeless subject! Let’s see how you approach it this week with Getting Baked!

ALLA PRIMA GALLERY FOLDER FOR CHALLENGE #9:

Again, any completed all prima exercise can be sent to: allaprimachallenges@gmail.com. We will add your effort to the appropriate Dropbox folder.

NEXT SESSION: MARCH 27:

IMPORTANT NOTICE: As mentioned in orientation, please direct all inquiries about the Alla Prima Challenges to: allaprimachallenges@gmail.com.

This week’s challenge: Happy Hour!

Happy Hour! : A Cocktail of Geometry, Symmetry, and Transparency

This week’s alla prima challenge, Happy Hour!, invites a shift in both subject matter and structural demand. While previous sessions had us leaning towards subjects with more flowing contours and biomorphic forms—such as fruit, flora, and organic matter—this week calls upon us to engage with subjects of a decidedly synthetic and geometric nature: cocktail-themed objects. Glassware, bar tools, and vibrant liquids introduce a unique array of perceptual challenges, including symmetry, hard-edged geometry, transparency, and translucency—each requiring a new level of strategic visual organization under time-sensitive conditions.

  1. The composition must include a cocktail or other similar libation!
  2. Palette Restrictions: None.
  3. Additional restrictions : 30-minute time limit
  4. No premixing.
  5. 5-stroke palette draw rule** in effect.

This week we will be taxed with navigating one or more of the following:

  1. Rigid Geometry
  2. Axial Symmetry
  3. Transparent & Translucent Materials
  4. Reflective Surfaces and Liquid “Behavior”

:red_triangle_pointed_up: Considerations & Strategies

1. Geometry & Symmetry

  • Identify Axes Early: Even in loose alla prima work, block in centerlines and horizontal cross-sections for symmetrical subjects like martini glasses or cylindrical tumblers.
  • Use Value to Define Volume: Employ edge variation and local contrast to reinforce the illusion of volume (e.g., internal reflections within a conical form).
  • Don’t Chase Perfect Symmetry: Minor asymmetries often read as optical corrections; obsessing over mathematical accuracy under a 30-minute time constraint will typically lead to stiffness or visual “hiccups.”

2. Transparent Materials

Transparency (e.g., clear glass) is not a “thing” you render directly—it’s a composite of:

  • Refracted Background Elements
  • Reflected Light
  • Light Passing Through
  • Edge Accents & Light Contour Compression

Tips:

  • Look for “Ghost Shapes”: These are slightly distorted silhouettes of background elements visible through the glass. Use soft-edge shifts in value to suggest their presence.
  • Highlight Edge Compression: Specular highlights can often occur at the rim or base—areas of greatest curvature. A single stroke of high contrast may sufficiently sell the illusion.
  • Leave Breathing Room: Don’t overrender. Suggest transparency by letting adjacent forms influence value subtly—especially through light occlusion or bounce.

3. Translucent Liquids

Unlike transparency, translucency scatters light rather than transmitting it cleanly. Think citrus juice, muddled herbs, or opaque syrups.

Tips:

  • Use soft transitions to imply scattering
  • Avoid high-contrast occlusions inside the form unless something is embedded within (e.g., ice, fruit)
  • Control edges near surface interaction zones (meniscus, splash lines, etc.) with care—often a single soft blur can communicate more than multiple hard shapes

4. Reflectivity & Gloss

Many cocktail elements feature reflective surfaces (steel shakers, glass rims, wet surfaces).

Strategies:

  • Gloss = High contrast in tight spaces: Small zones of intense value swing surrounded by neutral ground can effectively suggest sheen.
  • Reflections are Contextual, Not Arbitrary: Indications of nearby light sources or forms are better approximated than invented.
  • Look for “specular chains”: Multiple highlights (e.g., liquid meniscus + glass rim + surface reflection) help unify complex materials into a coherent light logic.

:light_bulb: Structural Shortcuts for Efficiency

Given the time cap and stroke limitations, here are some tactics that may maximize impact:

  • Use vertical strokes for stems, handles, and shafts to establish directional tension.
  • Triage your contrasts: Deploy your highest contrast areas where you want the viewer’s eye to land (e.g., highlight on glass rim, edge of liquid line).
  • Shadow anchors: Reinforce believability by tying objects to the surface with quick, directional cast shadows (especially with stemware).
  • Overlapping Elements: Even mild occlusion (e.g., an olive on a skewer inside a martini) builds strong spatial layering without excessive rendering.

:test_tube: Experimental Edge: Fluid Behavior

Cocktail imagery may introduce uncommon fluid dynamics—bubbles, splashes, viscosity gradients. Under alla prima constraints:

  • Avoid over-articulating bubbles or foam—a subtle value pattern often suffices.
  • Imply motion or other appropriate fluid “behavior” with a soft-edge line or gently tilted axis.

:cocktail_glass: Final Thoughts

This challenge isn’t just about painting a pretty drink—it’s about adapting your perceptual toolkit to handle geometry, symmetry, and material interaction with increased analytical awareness. Balancing hard and soft edges, directional lighting, and structural accuracy will become key allies.

Approach Happy Hour! with the same perceptual rigor as prior challenges—but with new considerations for formal geometry and optical material interaction. Cheers to complexity!

PS— You might want to enjoy your subject after this challenge! LOL! :stuck_out_tongue:

ALLA PRIMA GALLERY FOLDER FOR CHALLENGE #10:

Again, any completed alla prima exercise can be sent to: allaprimachallenges@gmail.com. We will add your effort to the appropriate Dropbox folder.

NEXT SESSION: APRIL 3:

IMPORTANT NOTICE: As mentioned in orientation, please direct all inquiries about the Alla Prima Challenges to: allaprimachallenges@gmail.com.

This week’s challenge: Illuminati!

Illuminati: Creating the Illusion of Radiant Light

This week’s alla prima challenge, Illuminati, asks artists to build compositions featuring a visible light source—a candle, glow stick, flashlight, string lights, etc.—and to use value, chroma, and contextual relationships to create the compelling illusion of emitted light. The focus isn’t on painting a glowing object per se, but rather on constructing a convincing context in which a particular color note or passage appears to radiate light into its surroundings.

This challenge draws from a range of perceptual strategies and historical conventions used to depict luminosity—from tenebristic drama à la Caravaggio, to the subtle halo glows of candles and fairy lights, to the vibrant neon spill seen in modern urban scenes.

Illuminati:

  • The composition must include a discernible light source (e.g., candle, glow stick, string lights, flashlight, LED, phone screen, etc.).
  • Time Limit: 40 minutes
  • No premixing allowed.
  • 5-stroke palette draw rule in effect.

Making Color “Radiate”

Creating the appearance of radiating light takes some work in terms of strategy and execution. We rely on a combination of value contrasts, chroma contrast, and the influence of context to simulate the behavior of emitted light. Here are some mechanisms to consider:


:bright_button: Context is Everything

Here are two great examples of how context can do much of the heavy lifting when it comes to the representation of a light source.

In panel (A), neuroscientist Beau Lotto offers a powerful illusion: the blue tiles appear not only to vary in lightness—but also in the nature of that lightness. The blue tiles in the illuminated regions of the cube seem to reflect light, while the same blue tile in shadow appears to be emitting it. This shift in perceived function—reflective vs. emissive—is entirely driven by surrounding context.

In panel (B), William Michael Harnett’s Still Life with the Telegraph (1880) achieves a similar perceptual feat. The glowing ember at the end of the pipe is rendered with a color that’s not especially high in value—but thanks to the controlled context and value relationships around it, it reads as radiant. A quiet but remarkable example of how light can be implied, not declared.

Contextual effects can be subtle, highly dramatic, or anything in between. Here’s two examples of contextual influences on communicating bright specular highlights as well as a fascinating effect called “Light Shedding.”

On the left is a section of one of my own paintings, (Favorite Pieces, 24x20", Oil on Panel) where carefully controlled bloom and subtle halo effects around highlights on metal surfaces create the impression of glowing reflection. These effects are constructed through value compression, soft edge transitions, and deliberate restraint of surrounding contrast, allowing certain highlights to visually “radiate.”

On the right is a powerful, well-known optical illusion often referred to as “light shedding.” The white circles appear to emit a soft glow due to surrounding radial contrast patterns—even though there’s no actual light involved. This illusion is a strong example of perceived emission based entirely on spatial context.

Here’s a few key concepts if your into ‘art-nerding-out’ on this stuff:

  • Light shedding relies on spatial contrast and structural patterning (often achromatic or low-chroma) to simulate radiance.
  • Neon spreading, by contrast, is chroma-driven—it involves highly saturated colors that seem to bleed into neighboring areas, producing a sense of ambient color rather than structural light.
  • Blooms are typically soft, low-frequency glow effects surrounding areas of high luminance, often resulting from overexposure or perceptual exaggeration.
  • Halos, on the other hand, tend to have sharper edges or chromatic boundaries, and often signal either a localized glow (like a candle’s corona) or a symbolic/perceptual radiance.

Together, these effects contribute to a context that can really sell raditing or emitting light!

Here are a few more GREAT examples from our own Deborah Kommalan!

Tenebrism and Controlled Contrast

Tenebristic lighting, championed by artists like Caravaggio, places intense illumination against dramatically dark surroundings. This extreme value contrast compresses light into a confined area, heightening the illusion of radiance. When surrounding values are carefully restrained, even modest highlights can appear to blaze. Interestingly, Caravaggio often implied his light source from outside the image frame—allowing the effects of light to drive the narrative without explicitly depicting the source itself.

However, artists like Georges de La Tour, inspired by Caravaggio’s theatrical contrasts, took a more literal approach—placing the light source directly into the composition to reinforce the illusion of glow and create a sense of narrative intimacy. Two notable examples:

Magdalene at the Mirror (National Gallery of Art) (left) is an oil on-canvas painting created circa 1635–1640. This version is known to be the original painting out of the Magdalene series. In Magdalene at the Mirror, Magdalene is shown in profile view sitting in front of the mirror, candle, and skull. The skull is on top of the Bible on the desk and the candle is covered by the skull. The viewer can only observe the top of the slightly shown candle and the light illuminating around it. The mirror shows the side of the skulls face yet the skull has its back towards the mirror.

Magdalene with Two Flames (Metropolitan Museum of Art, New York) (right) is an oil-on-canvas painting created between 1625 and 1650. The exact date is unknown. The skull is placed on Magdalene’s lap with her hands clasped over the head. The candle is brightly lit and is reflected within the mirror. The light from the candle illuminates throughout the room and on the wall where we see Magdalene’s shadow.

Halo Effects and Bloom

Building on the mention above, a subtle halo or bloom—often seen as soft transitions or low-chroma glows surrounding a light source—can strongly reinforce the illusion of light emission. This effect isn’t simply a blur; it’s a perceptual spill that mimics the way intense light appears to diffuse through air or reflect off nearby surfaces. In traditional media, this is often achieved through compressed value contrasts and gentle edge gradations.

In photography and digital rendering, bloom refers to a visual artifact where light from intensely bright areas appears to bleed into adjacent regions, forming glowing fringes or halos. This can occur in real-world cameras due to sensor overload, where excessive charge from bright light spills into neighboring pixels—a phenomenon known as charge bleeding. In computer graphics, the bloom effect is deliberately simulated to mimic this overflow, contributing to the illusion of a blinding or radiant light. Originally popularized by video game developers in the early 2000s (notably Tron 2.0), bloom has since become a stylistic tool in both interactive and cinematic rendering to evoke dreamlike or atmospheric visuals.

Whether in physical, photographic, or virtual space, bloom and halo effects act as perceptual cues, signaling that a surface is not merely lit—but emitting light.

Neon Spread and Chromatic Transitions

`

`

Highly saturated color notes—especially warm hues placed against cooler, more neutral surroundings—can create the powerful illusion of chromatic spreading, or what is often called color bleeding. This perceptual effect mimics how neon signs, LED strips, or other high-chroma light sources seem to cast colored light into nearby areas, even when their actual luminance remains relatively stable.

Unlike bloom, which is primarily value-based and concerned with brightness spill, neon spreading is chroma-driven. The eye interprets intense saturation as a cue for light emission, especially when that saturation subtly invades neighboring surfaces through carefully controlled color transitions. These transitions—often involving low-opacity glazes, softened edges, or gradient shifts in temperature—simulate how colored light diffuses in air or reflects off surrounding materials.

This phenomenon draws on both optical contrast and color temperature relationships, where warm-against-cool or complementary juxtapositions exaggerate the sense of radiant hue. When handled with precision, these chromatic shifts can make certain passages feel as though they are not just painted color—but light made visible.


:microscope: The Science Bit: Local Contrast and Luminance Anchoring

While the brightest point in your painting may not actually be physically bright (in terms of luminance), it can appear luminous if it is:

  • The highest value in the context, and
  • Surrounded by compressed or muted passages.

This perceptual anchoring is supported by studies in visual adaptation and contrast normalization, which show that the eye interprets relative relationships—not absolutes.


Final Thoughts

In Illuminati, your goal is not simply to depict a light source—it’s to make it feel like it’s doing something: illuminating, spilling, glowing. Consider how the presence of light affects not just the source, but its environment—surfaces catch reflections, shadows sharpen or dissolve, and color shifts subtly with falloff.

Ask yourself:

  • Where is my highest value—and is it earned?
  • How are the surrounding areas helping (or hurting) the glow?
  • Can I imply light without painting the light itself?

Let’s see who can bend perception to make paint glow like flame.

ALLA PRIMA GALLERY FOLDER FOR CHALLENGE #11:

Again, any completed all prima exercise can be sent to: allaprimachallenges@gmail.com. We will add your effort to the appropriate Dropbox folder.

NEXT SESSION: APRIL 10:

IMPORTANT NOTICE: As mentioned in orientation, please direct all inquiries about the Alla Prima Challenges to: allaprimachallenges@gmail.com.

This week’s challenge: The Albers Challenge

The Albers Challenge: Communicating Canonical Color in Context

This week’s alla prima challenge asks artists to tackle one of the most deceptively simple but profoundly complex visual problems in painting: Can you make a red apple still seem red… under green or blue light?

Inspired by Josef Albers’ groundbreaking work *Interaction of Color* (1963), this challenge explores how perceived color is shaped not by isolated pigment, but by surrounding context. Your task is to choose an object strongly associated with a canonical color (like a red apple, yellow banana, orange pumpkin, etc.) and depict it in a colored light (e.g., green, blue, violet) that suppresses or distorts its natural appearance. Your goal? Use contextual cues to keep that object’s identity — and its canonical color — perceptually alive.

The Albers Challenge:

  • Choose a subject with a clear canonical color (e.g., lemon = yellow, fire truck = red).
  • Illuminate your subject in a non-neutral colored light (e.g., blue, green, violet).
  • Your job is to make the object still read as its canonical color despite the chromatic suppression.
  • Time Limit: 30 minutes
  • No premixing allowed
  • 5-stroke palette draw rule in effect

Note: If you need colored transparencies or gels to ‘tint’ you lights, these are the ones we use from Amazon: Amazon.com : SAKOLLA 16 Pack Color Correction Gel Light Filter - Transparent Color Lighting Gel Filter Plastic Sheets, 8.5 by 11 Inches, 8 Colors : Electronics


Why “Albers Challenge”?

The name honors Josef Albers, a pivotal figure in 20th-century color theory and pedagogy. His text Interaction of Color introduced a radical shift: color is not a fixed entity, but a relational phenomenon. His teaching emphasized that the same color can appear differently depending on its context — and conversely, different colors can be made to appear the same.

What Is Color Constancy?

Color constancy is a perceptual phenomenon where the colors of objects appear relatively unchanged even when the lighting conditions change. It’s a function of our visual system that allows us to identify objects correctly across varying illuminants, despite dramatic shifts in the wavelengths being reflected.

From a physics standpoint, the actual light reaching your eyes from the objects under green illumination is radically different than under white light. For example, red objects reflect far less light under green lighting — they should appear much darker, or even brownish.

But your brain doesn’t just process raw wavelength data. Instead, it uses:

  • Contextual cues (e.g., shadows, adjacent objects),
  • Memory colors (e.g., bananas = yellow),
  • Relational comparisons across the scene to normalize your perception of color. That’s what allows the banana to still “read” as yellow even when it’s reflecting mostly green light.

:bullseye: How This Relates to the Albers Challenge

The Albers Challenge puts color constancy to the test — and flips it on its head. You can see in the above image that your brain still sees a yellow banana in spite of the two versions being lit VERY differently. In fact, notice how the local of the “green grapes” in one context matches the orange in another. Your brain does some amazing work here — allowing you to experience a type of stability in the face of significant change.

In the Albers Challenge you must do the heavy lifting as the artist — deliberately constructing a context that supports the perception of a canonical color, even when the actual local color on the surface is quite different than what you might initially expect.

For example:

  • Under green light, a red apple may reflect so little red light that it appears nearly black.
  • Under blue light, the same red apple might take on a muted purple or muddy violet appearance, as red wavelengths are once again suppressed, and cool hues dominate.
  • But in both cases, if you create the right surrounding context — such as:
    • Complementary color relationships (e.g., placing the apple near green or cyan objects to enhance its warmth),
    • Memory-driven object identity (the iconic round form, smooth texture, and familiar stem),
    • Value anchoring and contrast (compressing surrounding values to allow even desaturated reds to read as dominant),
    • Or strategic edge handling and spatial cues,
      —you can trick the viewer’s brain into perceiving “red” anyway.

In other words:
You are not just painting how a red apple looks under blue light — you are painting how it can still feel red, even when the local chroma and value say otherwise.

This perceptual bait-and-switch is exactly the kind of phenomenon Albers was revealing in Interaction of Color — and your brush is now the experiment.

This is not just painting — it’s perceptual engineering!!!.


Science Tie-In (Relevant to Albers’ Legacy)

Albers showed in Interaction of Color that color is relative, not absolute. He gave exercises where:

  • Identical colors appeared different depending on surrounding hues.
  • Different colors appeared identical in just the right context.

This image up top proves him right — not in abstract color swatches, but in real-world perception. The banana under green light should look wrong — but it doesn’t, because the brain adjusts for lighting using contextual expectations.

Your job in the challenge is to recreate that adjustment artificially — to manipulate perceptual cues so the viewer’s brain does the same thing it’s doing here.


The Challenge of Canonical Color

Canonical color refers to the most commonly associated color of an object — what your brain “knows” something should look like. But once you place that object under a strongly colored light, its physical appearance often departs drastically from that memory. A yellow banana in blue light may appear greenish or gray. A red apple under green light may verge on black. Your challenge is to reconcile what the viewer sees with what they expect — through context, contrast, and cues.

This is not “matching a color.” It’s communicating a color.


Perceptual Strategies to Consider

1. Simultaneous Contrast

Placing a color next to its complement can boost its perceived intensity. For example, placing desaturated red-violets near green may reinvigorate a suppressed red.

2. Value and Chroma Anchoring

Just as in the “Illuminati” challenge, anchoring high-chroma or high-value notes within a restrained value range can make them pop. The more compressed your surrounding value structure, the more potent your chroma signal becomes.

3. Object Identity Cues

The form, texture, and familiar contours of your subject help the viewer’s brain “fill in” missing or ambiguous chromatic cues. A well-drawn banana shape might allow you to paint it with only subtle yellow-green notes and still have it “read” as yellow.

4. Perceptual Inference (A1–A2 Model)

As described in the Waichulis Lexicon, viewers never see an object directly (A). They only respond to their own perception (A2), which is informed by the surrogate you provide. If you can align your representation with their memory of A, even in chromatically compromised conditions, you’ll succeed.


Color Science Sidebar: Why This Works

According to visual perception research (Purves et al., Palmer, Lotto), color perception is not about measuring wavelengths — it’s about interpreting environmental signals based on prior experience. The brain uses statistical expectations (what colors usually go with what shapes) and contextual cues (how light behaves) to resolve ambiguity. This is the same strategy you’re leveraging in this challenge.

It’s not “see → paint.” It’s “know → imply.”


Final Thoughts

The Albers Challenge is not just about accuracy — it’s about navigating the bridge between what see and what we believe we ‘should’ be seeing. Ask yourself:

  • Can I make the viewer see “red” without painting red?
  • What role is surrounding color and value playing in my communication?
  • Am I allowing memory color and object identity to do some of the work?

Let’s see who can bend color relationships to their will — and make a green-lit apple feel redder than red.

ALLA PRIMA GALLERY FOLDER FOR CHALLENGE #12:

Again, any completed all prima exercise can be sent to: allaprimachallenges@gmail.com. We will add your effort to the appropriate Dropbox folder.

NEXT SESSION: APRIL 24:

IMPORTANT NOTICE: As mentioned in orientation, please direct all inquiries about the Alla Prima Challenges to: allaprimachallenges@gmail.com.

This week’s challenge: Foolin’ the Eye

Foolin’ the Eye: Ditching Detail for Low-Spatial Information

This week’s alla prima challenge—Foolin’ the Eye—asks you to defy the traditional association between trompe l’oeil and meticulous rendering.

While trompe l’oeil (French for “fool the eye”) often conjures visions of hyper-polished surfaces and photographic detail, this exercise flips the script. Your mission is to create a convincing illusion of depth, volume, or presence without relying on high spatial frequency information (fine edges, intricate textures, or tiny highlights).

Instead, you’ll focus on the low spatial frequency cues that your visual system uses first—broad value masses, silhouette integrity, form lighting, and edge control. These are the perceptual powerhouses behind convincing dimensionality.

With just 40 minutes and no premixing allowed, you’ll need to build illusion with economy and intent. Can you sell the form without the finish?

Foolin’ the Eye

  • Construct a composition featuring a subject (or subjects) with clear kinship to traditional Trompe L’Oeil still life works.
  • Time Limit: 40 minutes
  • No premixing allowed
  • 5-stroke palette draw rule in effect

A Brief History of Trompe l’Oeil

Trompe l’Oeil, French for “fool the eye,” refers to a visual art technique that creates the illusion of three-dimensionality on a flat surface. The goal is not just representation—but deception. These works challenge the boundary between real space and pictorial space by inviting the viewer to question what is painted and what is actual.

The origins of trompe l’oeil can be traced back to Ancient Greece, most famously through the anecdote of the painter Zeuxis, who supposedly painted grapes so realistically that birds tried to eat them. His rival, Parrhasius, painted a curtain so convincing that Zeuxis tried to draw it aside. These early stories highlight not only artistic competition but also the psychological impact of illusion in art.

In Pompeian frescoes, trompe l’oeil elements were used to extend architecture, open up walls, or insert faux windows and columns. These were early explorations into spatial simulation, laying the groundwork for later Western traditions.

The technique saw a significant revival during the Renaissance and especially the Baroque period, when artists like Andrea Pozzo painted grand ceilings that seemed to open to the heavens using forced perspective. The invention of linear perspective gave trompe l’oeil new precision, enabling more convincing illusions.

In Northern Europe, particularly in Dutch Golden Age painting, trompe l’oeil became a specialized genre. Artists like Samuel van Hoogstraten and Cornelis Gijsbrechts created wall-hung letter racks, curling papers, and framed notices so convincingly rendered that they could be mistaken for the real thing. These works emphasized shallow depth, occlusion, and hard edge control.

In the 19th century, American artists like William Michael Harnett and John F. Peto continued the tradition with compositions that depicted coins, books, violins, and clippings nailed to wooden doors. Their work emphasized not only technical skill but also the cultural and psychological impact of illusion—the boundary between what is seen and what is believed.

Some Traditional Trompe l’Oeil Criteria

Trompe l’oeil ‘illusionism’ typically relies on a fairly consistent set of visual strategies, including (but not limited to):

  • High Spatial Frequency Detail – Finely resolved surfaces, textures, and crisp edges
  • Hard Edge Resolution – Clear occlusion boundaries and tightly controlled contours
  • Shallow Pictorial Depth – Flattened space to limit parallax and enhance ambiguity
  • Logical and Anchored Lighting – Clear directional light with strong cast shadows
  • Occlusion and Contact Cues – Overlaps, edges, and intersections to signal spatial relationships
  • Consistent Scale and Perspective – Avoidance of atmospheric or deep recession
  • High Contrast Anchors – Localized visual weight to “nail down” forms
  • Conservative Protrusions of Volume – Objects rarely extend far from the surface plane, minimizing sensitivity to motion parallax (which could otherwise reveal the illusion)

What We’re Working With This Week

In this week’s alla prima challenge, many of these traditional illusion tools are intentionally restricted:

  • :cross_mark: High spatial frequency rendering (no tight detail, text, or textures)
  • :cross_mark: Extended working time (40-minute limit = no time for extensive rendering/refinement)
  • :white_check_mark: Shallow compositions, familiar forms, and vertical orientation remain viable
  • :white_check_mark: Low spatial frequency strategies—broad value zones, cast shadows, silhouette clarity, and edge modulation—are your primary means of illusion

:brain: A Core Focus for this week: Spatial Frequency in Perceptual Illusion

Our perceptual system processes visual input using a range of spatial frequency bands:

  • Low Spatial Frequency (LSF) – Handles gross shape, massing, and value structures. Dominates early recognition and guides attention.
  • High Spatial Frequency (HSF) – Resolves edges, fine texture, and detail.

While trompe l’oeil is traditionally associated with HSF (minute detail), LSF is critical in driving perceptual reads of volume and depth. In fact, visual research has shown that our visual system resolves mass and lighting direction before engaging with edge or surface texture.

This week, the challenge is to lean into LSF—to convince the viewer of form, weight, and spatial orientation without relying on the use of detail.


:toolbox: Practice Goals:

  • Establish form through broad value groups, not texture or edge tightness.
  • Focus on silhouette, occlusion, and cast shadows to promote form.
  • Use edge variety to indicate depth transitions (soft for turning forms, hard for occlusions).
  • Anchor your subject with minimal sharp contrast—use it where it will have the most perceptual impact.
  • Resist over-modeling. Ask: Can I strip this down and still “read” volume?

:light_bulb: Inspirations for this week:

Euan Uglow, Daisy, 1976, Oil on canvas, 35 x 25.4 cm, 13 3/4 x 10 in)

Carel Fabritius, The Goldfinch, 1654, Oil on Panel, (33.5 cm × 22.8 cm (13.2 in × 9.0 in)

John Frederick Peto, The Old Violin (DETAIL), c. 1890, 77.2 × 58.1 cm (30 3/8 × 22 7/8 in.)


A Deep Thought for this week:

Ask yourself throughout:
“Am I painting the information, or am I painting the cue that triggers the illusion?”

Let’s see how well you can fool the eye—with the fewest marks possible.

ALLA PRIMA GALLERY FOLDER FOR CHALLENGE #13:

Again, any completed all prima exercise can be sent to: allaprimachallenges@gmail.com. We will add your effort to the appropriate Dropbox folder.

NEXT SESSION: MAY 1:

IMPORTANT NOTICE: As mentioned in orientation, please direct all inquiries about the Alla Prima Challenges to: allaprimachallenges@gmail.com.

This week’s challenge: Translucent Transitions

Translucent Transitions: Painting the Glow Within

This week’s alla prima challenge asks you to capture the delicate, glowing quality of materials that let light pass through, but not without a little ‘blur’ and ‘diffusion.’

While transparency lets us see straight through a surface (like glass or clean water), translucency lives in a more complex perceptual space—where light scatters, edges soften, and forms seem to radiate from within. Your mission is to create the convincing appearance of translucency by leveraging subtle transitions, soft edge work, internal light, and diffuse color modulations.

You’ll need to focus on surface lighting cues, edge attenuation, and internal glow, balancing the tension between what’s seen and what’s suggested. Avoid sharp outlines and crisp reflections—those are the signatures of transparency, not translucency!

With just 30 minutes and no palette restrictions, your brushwork must be decisive yet sensitive. Can you paint the glow beneath the surface?

Translucent Transitions

  • Your composition must communicate translucency with at least one subject.
  • Time Limit: 30 minutes
  • No premixing allowed
  • 5-stroke palette draw rule in effect

Translucency vs. Transparency:
Translucency refers to a material property where light passes through diffusely — meaning that while light permeates the material, detailed images do not. In contrast, transparency allows light to pass through with minimal scattering, preserving the clarity of shapes and details behind the material. (Example: frosted glass = translucent, clear glass = transparent.)

Perceptual Mechanisms:
According to Palmer’s Vision Science: Photons to Phenomenology , translucent appearances are perceived through a combination of light scatter, surface texture, and local contrast modulation. Our visual system interprets these cues using learned correlations rather than direct measurements of physical properties, consistent with the empirical framework outlined by Purves et al. in Why We See Things the Way We Do.

Key Visual Cues for Translucency:

  • Subsurface scattering: Light penetrates a material, interacts internally, and exits at different points, producing soft glows (e.g., candle wax, human skin).
  • Diffuse transmission: The object glows with interior light without sharp shadow projections.
  • Edge attenuation (reduction of diminishment): Lighter, softer edges where light exits material boundaries are common.
  • Color bleeding: Hints of internal color may spread outward into surrounding illumination.

Scientific Insights:
Studies of translucency perception (Motoyoshi, 2010) indicate that local contrast reduction and blur gradients across a surface play major roles in how the brain infers translucency. Experiments have shown that even slight changes in edge sharpness or internal contrast can shift a viewer’s interpretation between “solid,” “translucent,” or "transparent"​​.

Strategies for Artists:

  • Control edge softness: Translucent objects can often seem to have softer, less distinct boundaries around areas where translucent light is emerging.
  • Utilize internal light: Emphasize glowing internal highlights rather than surface reflections alone.
  • Minimize deployment of hard, specular highlights: High-contrast, mirror-like reflections suggest transparency or opacity, not translucency.
  • Incorporate ambient color shifts: Subtle shifts within the form enhance the perception of light moving through material.

Additional Context:
“Unlike opaque forms, where surface reflection dominates perception, and unlike transparent forms, where clear transmission of form dominates, translucent forms are interpreted through the cumulative relationship between transmitted and reflected light, filtered by the brain’s prior learned associations with similar visual stimuli​​.”

A Deep Thought for this week:

Ask yourself throughout: “Am I too focused on what my subject is, or am I also considering what the light is doing to it?” Let’s see how you handle the light dynamics for this week!

ALLA PRIMA GALLERY FOLDER FOR CHALLENGE #14:

Again, any completed all prima exercise can be sent to: allaprimachallenges@gmail.com. We will add your effort to the appropriate Dropbox folder.