No problem Dan, it’s a great way for me to revise all my notes and actually go through the various photos from the workshop. It’s also cool to simply have people to bounce off about art and share this kind of tech talk, especially with folk who can chip in with their own observations, experiences, questions and opinions.
Hi Martin, A really good post. I am one of MJA’s regular workshop goers I was in Belfast straight after your one I think. The more I attend his workshops (I reckon 10 at this stage), the more I HEAR. I take notes but yours are much more coherent.- thank you. He really is the Maestro and I’ve learnt so much from him. Thanks for sharing your notes. Judy
Hi Judy, absolutely, the Maestro, what a guy. I wish I could have done the Belfast workshop too, there’s just so much to learn.
Which picture did you pick and were you pleased with your result? Also any revelations or sage advice taken away from that course?
I came across this photo from your workshop which has actual labelled sections of the step by step process which may clarify these stages for other folk:-
I mentioned earlier that the Girl with a Pearl Earring had an over zealous cleaning job done on it in the 90’s which removed the top layers of coloured glazes, while this is obviously a terrible thing, it does mean that the current version of the painting gives us an idea of how that painting looked before the final glazes were applied. Here’s a photo MJA sent me:- a before and after shot, so you can see the warm glazes in full effect, versus how they now appear. He took the photo himself 40 odd years ago.
Here’s a close-up of the “cleaning” in progress, the rectangle at the top left still has it’s beautiful warm glaze.
You can also see from this close-up how soft Vermeer liked his edges, look how sharp the cracks in the paint are in contrast to the lines of the eyelid for example.
So sorry. I thought I’d replied A great example of the process Martin, thank you. Your notes are great I painted s still Life and made a start on a second one. (A change from the figure work).
Thanks Martin. I chose the still lifes for the chiaroscuro effect (although I had a disaster half way through the oranges one - I used medium that had mineral spirits in it. I had to re-do the background when I got home). I’m an MJA fan - I’ve learnt so much from him. Judy
Don’t get me started on “restorations” and “cleanings” Martin. Outside of cases of severe damage, I personally find it to be an abhorrent practice. This is one of the main reasons I add a final coat of Liquin to my paintings. They should have a heck of a time trying to get through it.
Great works Judy! Thank you for sharing them here. I too am a big fan of “emergence” or controlled lost/found edges in representational work. It can offer wonderful opportunities for viewer closure/visual completion. Hope you’ll be sharing more!
Thank you Anthony, I really enjoyed painting them.
I’m REALLY interested in the liquin layer. I used a medium of liquin (2 parts) , linseed (1 part) and sometimes OMS (1 part). Is it ok to paint the final layer of liquin over that medium taking the fat over lean into consideration? How long do you wait to paint the layer? Touch dry? Apologies for all the questions but I was going to post the same question
Hi Judy—Please never apologize for any number of questions. That’s what all of this is here for.
Regarding Liquin as a final coat over the medium that you use: I cannot speak to that exact scenario with any experience. However, I can give you some food for thought that may help you to navigate the issue for yourself. I should state that while I use Liquin for very specific reasons—I try not to promote it’s use in this fashion (as a final coat) as many conservators and material gurus rail against it. If you would like to read my full reasons for using the material in this way I have a comprehensive article here:
Additionally, a common heuristic involving mediums and varnishes is that you should never varnish with the same material that was used as a medium. The reason being that future restoration that involves the removal of the varnish may adversely impact the integrity of the paint film (containing the same materials.) However, some rule-of-thumb guidelines are being challenges by some contemporary experts. Here is a recent post from Natural Pigments’ George O’Hanlon regarding some commonly held (and sometimes confusing) concepts—including one that may be relevant to your question.
Confusing Concepts in Oil Painting: Fat over Lean… Thick Over Thin… Thick Over Lean… Whatever…
It’s Time to Get Rid of Them. - By George O’Hanlon
Let’s toss out the concepts of “fat over lean” and for that matter “thick over thin” (or the confused “thick over lean”) while we are at it, and let’s consider the physical structure of the paint.
To help you to understand the properties of oil paint, it is helpful to understand the relation between the pigment and oil. One way to think about the relationship between pigment and binder is a brick wall. Every mason knows there is an ideal ratio of mortar to brick. Too much mortar and the wall is weak. Not enough mortar and the bricks fall apart.
The same relationship exists between the pigments and binder in dried paint. We call this relationship or ratio the pigment volume concentration or PVC. Pigment volume concentration (PVC) is the volume of pigment compared to the volume of all solids. If paint has a PVC of 30, than 30% of the total binder/pigment is pigment and 70% is binder solids.
The point at which there is just enough binder to wet pigment particles is called the critical pigment volume concentration (cPVC). For almost all colors this is between 45% and 55% PVC. Films with lower concentrations of pigment have more gloss but as the PVC increases they become increasingly matte. Films with high percentages of pigment are more permeable to moisture and susceptible to solvents. This is because with more pigment, there is less binder to fill the voids between pigment particles. This porosity leaves the film open to the environment. Films with higher pigmentation have increasingly lower tensile strength. (See the graph.)
As the PVC increases past the cPVC, the dried paint film will contain voids. The porosity will increase, moisture vapor transmission will increase, wet hiding will decrease, but dry hiding will increase. As the paint dries, a condition will exist where the paint has too much pigment and too little oil such that the internal voids created will entrap air or solvent in the vapor phase.
Most paint in tubes contain enough binder to wet and envelope pigment particles and so are at about the critical pigment volume concentration or cPVC for that pigment or mixture of pigments. The variation in the pigment volume of particular colors between brands are due to the type of oil used, the amount of oil (some paint makers may choose to make their colors softer or thicker) and the amount of additives used in their formulation.
So the best way to discuss paint is by understanding this relation between pigment and oil which is expressed as the pigment volume concentration (PVC). Oil paint straight out of the tube is in the form of a paste and is usually near its cPVC. Adding oil to paste paint lowers the PVC (low PVC), while adding solvent potentially increases the PVC (high PVC). Hence the ideal paint is a paste paint and this is why the admonition to “apply thick paint thinly” or work with paste paint in thin layers, is the best practice for oil painting.
From this it is clear that paint consists of both liquid and solid components. In the case of oil paint, the liquid component is a drying vegetable oil. The oil undergoes chemical and physical processes that change it from a liquid to a solid, which process is called “oxidative polymerization”. Oil is the binder or glue that holds the pigment particles together and on to a substrate.
You may think of paint as pigmented or colored adhesive. When it comes to adhesion in oil paint, oil is the glue. While many artists believe that mechanical adhesion is most important when it comes to paint, what is more important is “dispersive adhesion”, which does not rely on absorption of the binder or oil into a porous substrate substrate or on surface texture (although they can improve dispersive adhesion) but rather on surface energy and polarity. Hence, paste paint adheres better than paint that has been heavily diluted with solvent (high PVC) even if it is partially absorbed into the substrate, because the latter has less oil or glue to adhere pigment particles to the surface of the substrate. -George O’Hanlon
Here’s some information I posted on another thread, essentially:- MJA also recommends an intermediary coat of liquin before any varnish is applied.
After weighing up the pros and cons and taking full responsibility for any problems that might arise, with a 2" brush as similar as I had to the kind Anthony suggested, I applied a thin coat of liquin original to my Vermeer. I was content that I wasn’t going to be putting any more paint on there and may yet add an actual real layer of varnish on top just to try that out, but so far I’m very happy with the effect as it stands. It has a satin finish and has unified the sheen and given an equal saturation of darks and lights across the painting.
I know it is often recommended to wait at least 6-12 months before varnishing so that layers of paint have time to fully cure, but in practice these things often need to be done sooner. Mine was touch dry and left an additional two weeks before I did anything (MJA said this was an acceptable timeframe and his students often varnished paintings much sooner than that out of necessity). I had also used alkyd paints and mixed a bit of liquin in with the medium to aid drying. Of course if there was a lot of oil added for some reason or some thick impasto I would be more cautious.
Hello again, I thought I’d replied but looking through the posts, I can’t find it. Thank you for replying about the liquin question. It’s very interesting and I will give it a try. I’m glad I looked right through the thread too as I was going to use the Fine Detail Liquin which seems to darken quite a bit. Thanks again Judy
MJA had an interesting take on it - he stated that using plenty of solvent is fine (i.e. for underpainting/blocking in), specifically because as it evaporates it is leaving microscopic holes in the paint layer which increases adhesion for subsequent overpainting. Now this does sound plausible, but I don’t know whether that has any scientific basis or it’s just his own personal hypothesis from having done it for several decades.
Figured I’d post something as I’ve been quiet on here for a while - I’ve had my easel tied up lately, preventing me making further progress into my dark pressure scales, as I’ve been revising my notes from this MJA workshop to produce a second (and more carefully approached) version of the Girl with a Pearl Earring!
It’s taken less time in total than the original workshop but has been spread out and hour or two every Sunday over a much longer period. This lack of rush and additional drying time has really helped. The only deviation I made from MJA’s instructions were that I put a lot more detail into the cartoon and drawing transfer:-
Here’s the first layer of grisaille roughed in (image below), check out how awful this looks! it is absolutely revolting, right, scroll down more as it gets a hell of a lot better once I start refining the values and edges in the second layer…
I’ve got a couple of warm glazes to go, and I got some of that cracking varnish too which I’ll give a shot and report back. Here’s a couple of close-ups to show how soft I’m trying to be with the edges in the meantime.


 A great example of the process Martin, thank you. Your notes are great I painted s still Life and made a start on a second one. (A change from the figure work).
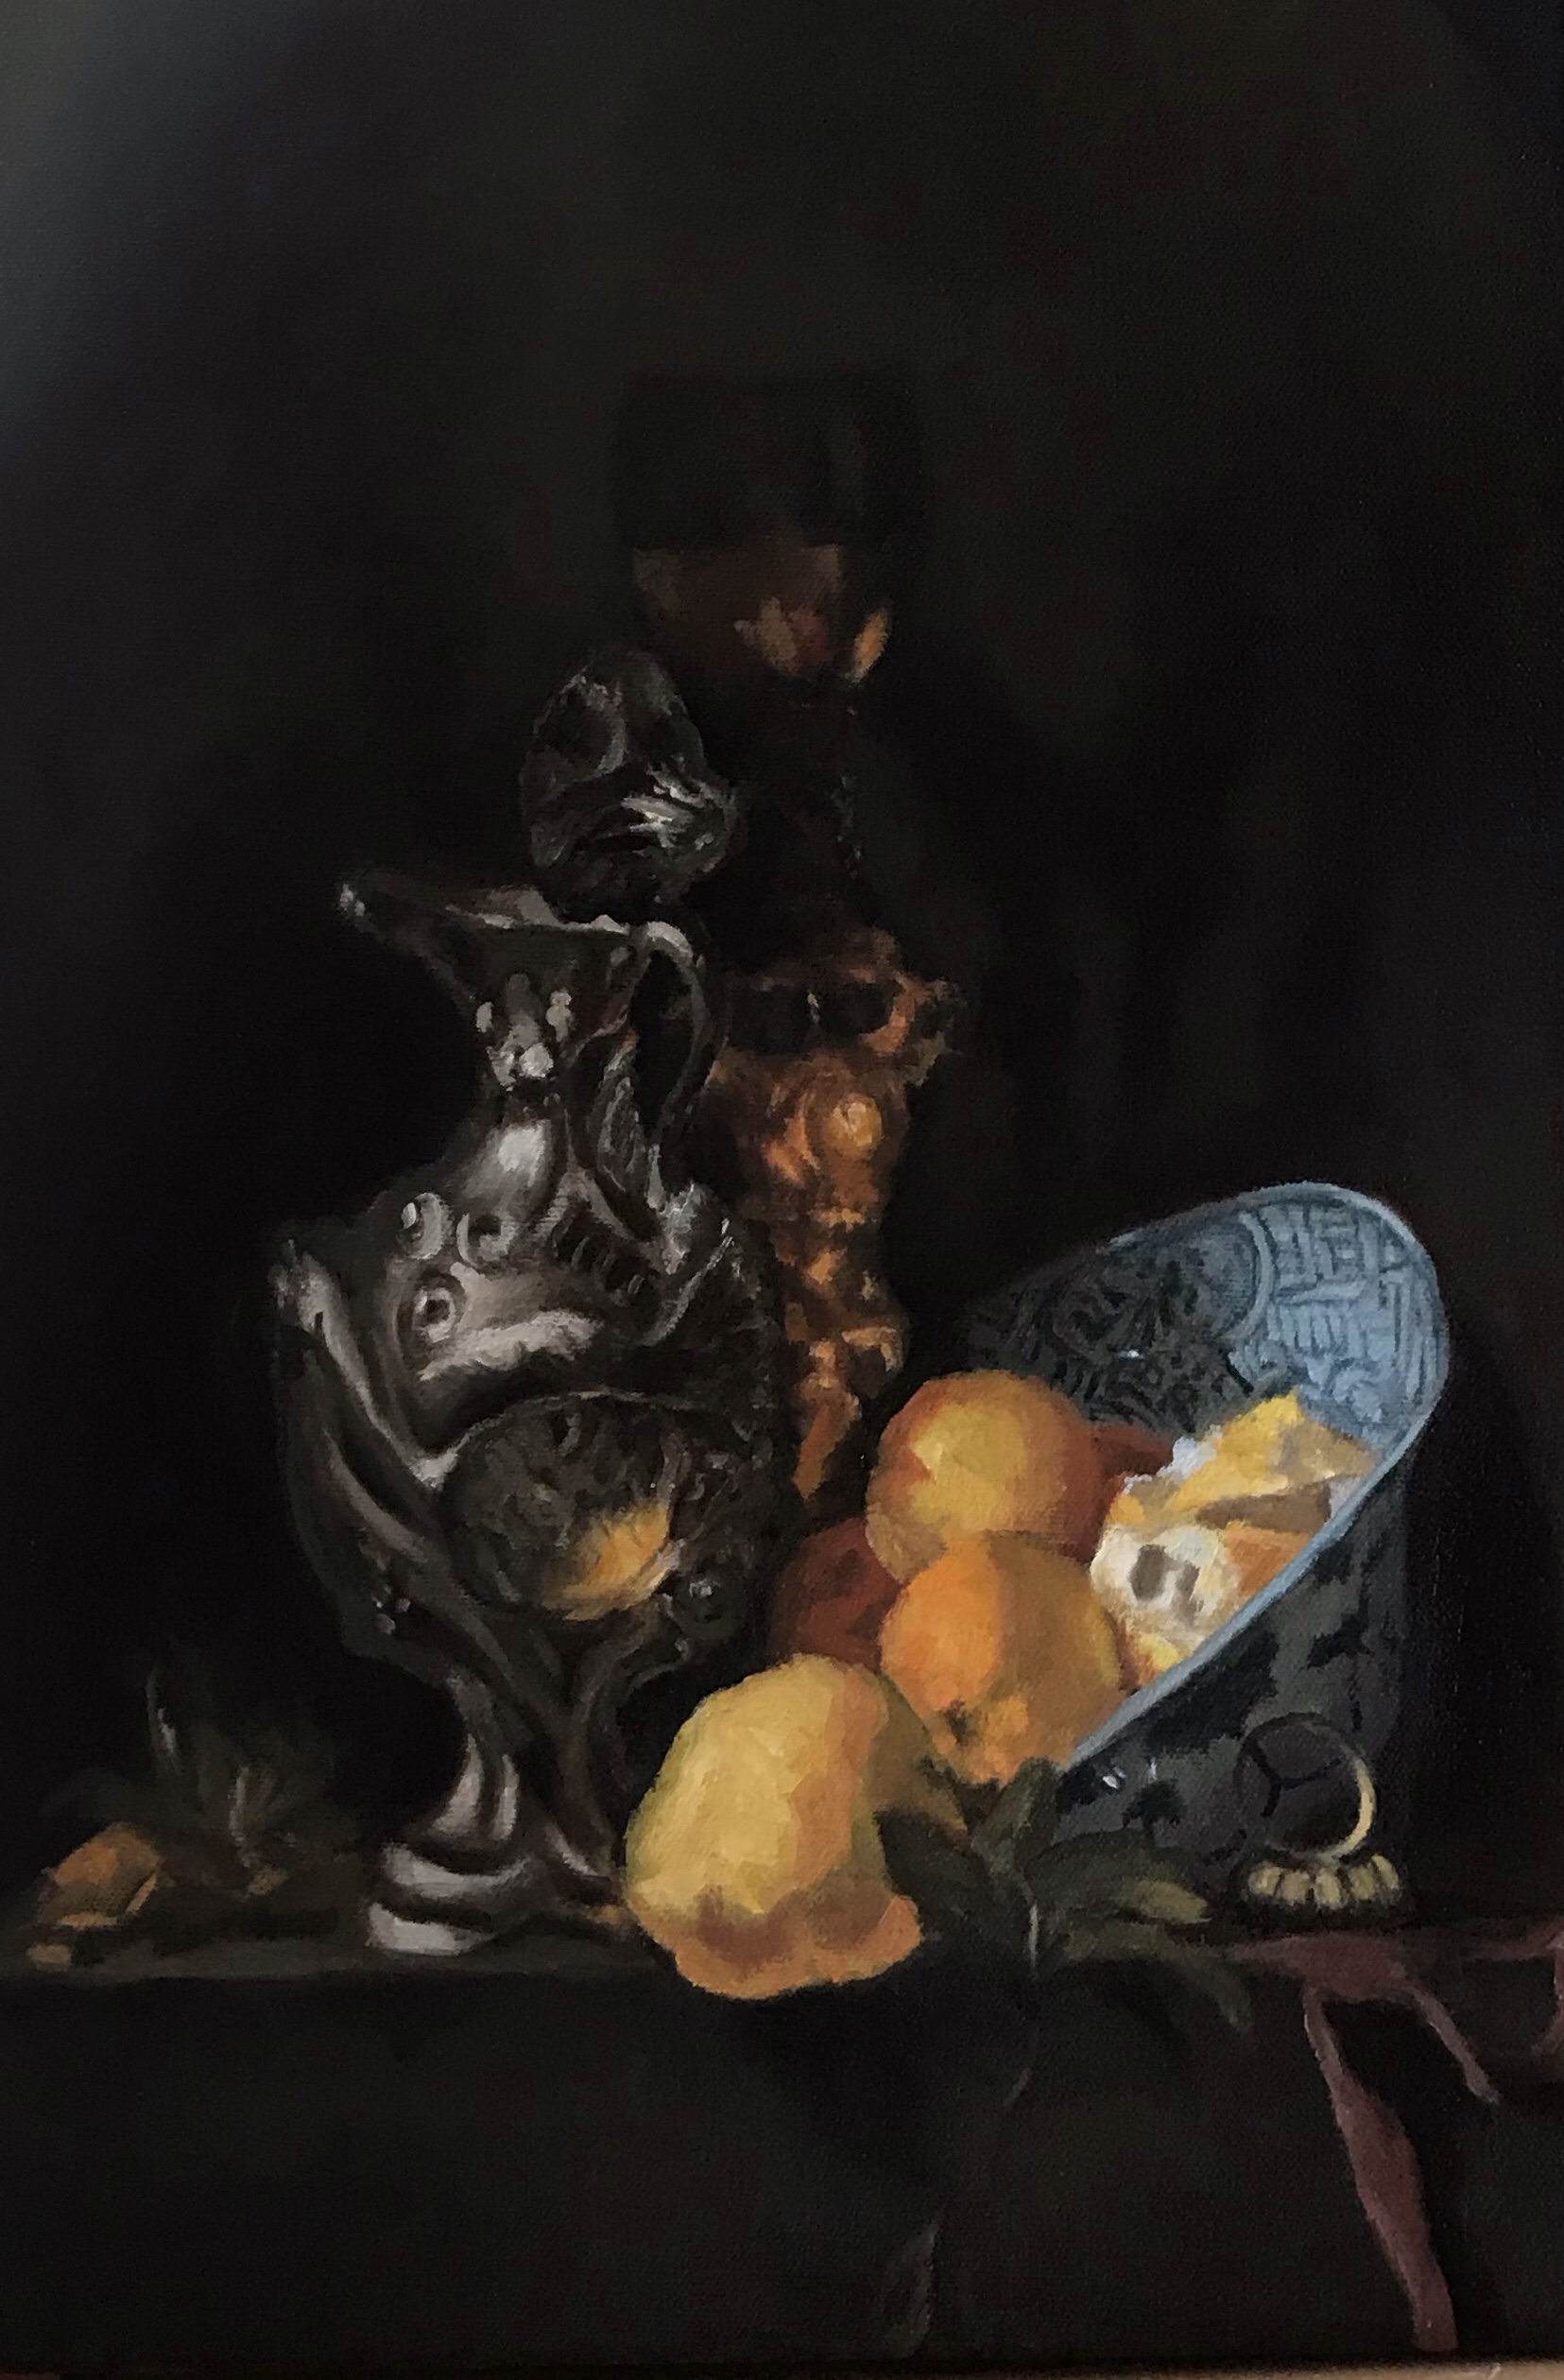
 Not sure if these have uploaded or not Anyway - lovely to connect Martin i’ll Be following you. (Er not stalking!!) judy


