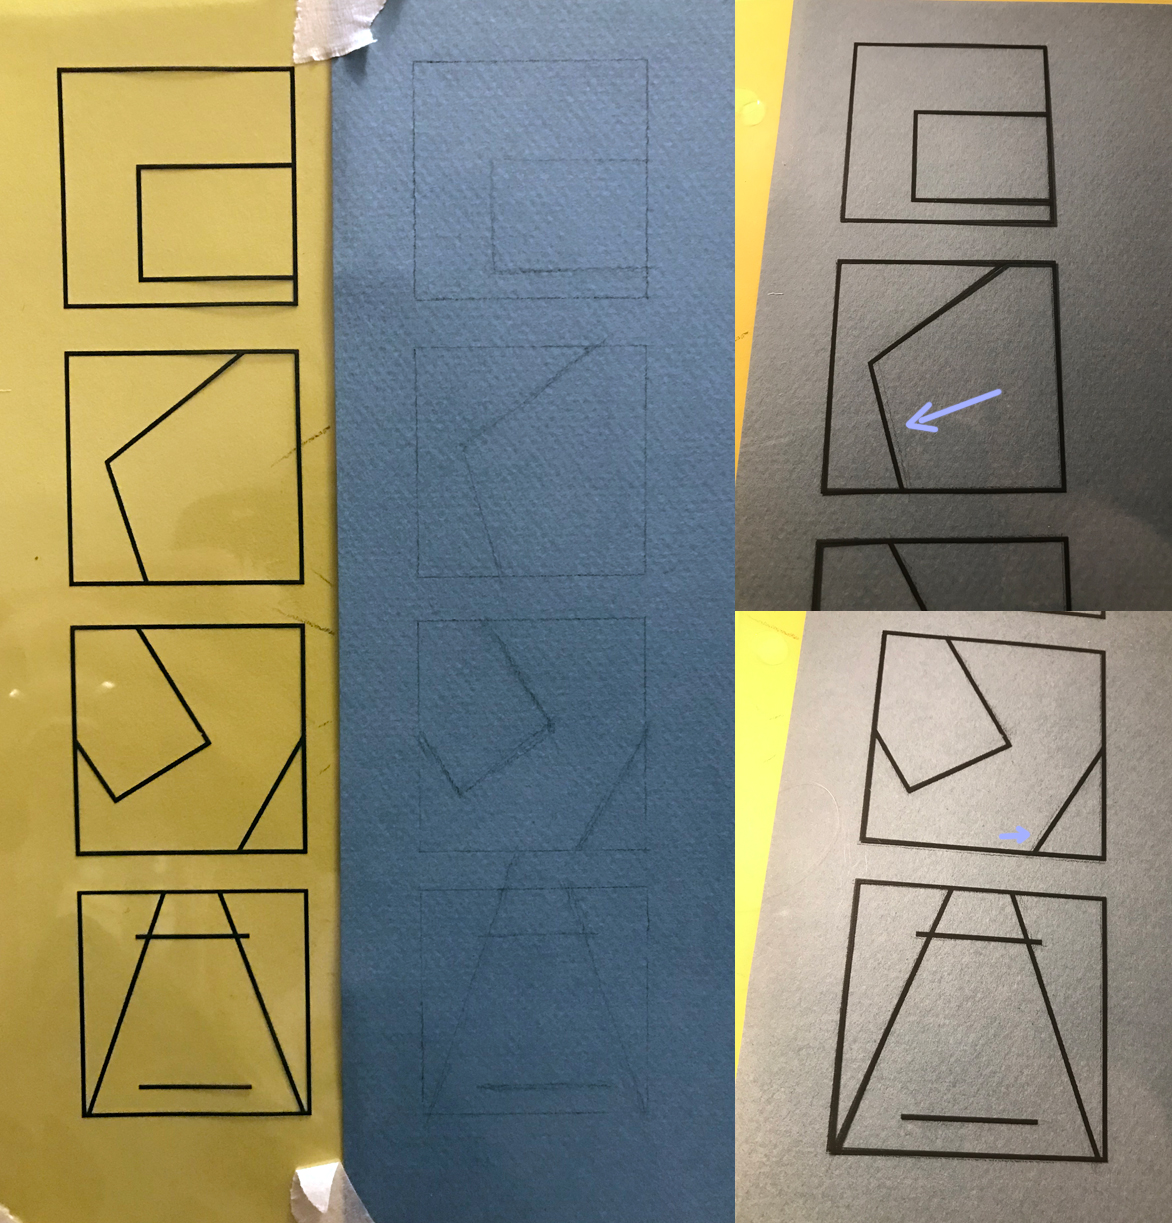
I eventually got set up to start the shape replication exercises today didn’t quite set up right and drew a couple of boxes out of alignment which I paid the price for, so no cutting corners next time.
So my first replication is in the middle column and then with the overlay on the right, I’ve marked out where I missed the ball the most (these are corrected now) had to take the photo at a jaunty angle to avoid reflection.
I then thought I would be clever and move the overlay along, letting it stick to the paper by static charge alone. Not a good idea it turns out. The second box I drew was too short and my shape replication was wrong proportional to this (I highlighted where the line should have been)
I should have also put a blank piece of paper under so my previous shape rep drawings weren’t visible through the transparent film, but not the end of the world.
There are a couple more errors here which I corrected, so next time I’m going to be sure I set up better and align my squares correctly so I can’t blame them for my poor draughtsmanship. I’m going to repeat these again before I move to the next page of reps.
As always, any pointers/advice/opinions are very welcome.
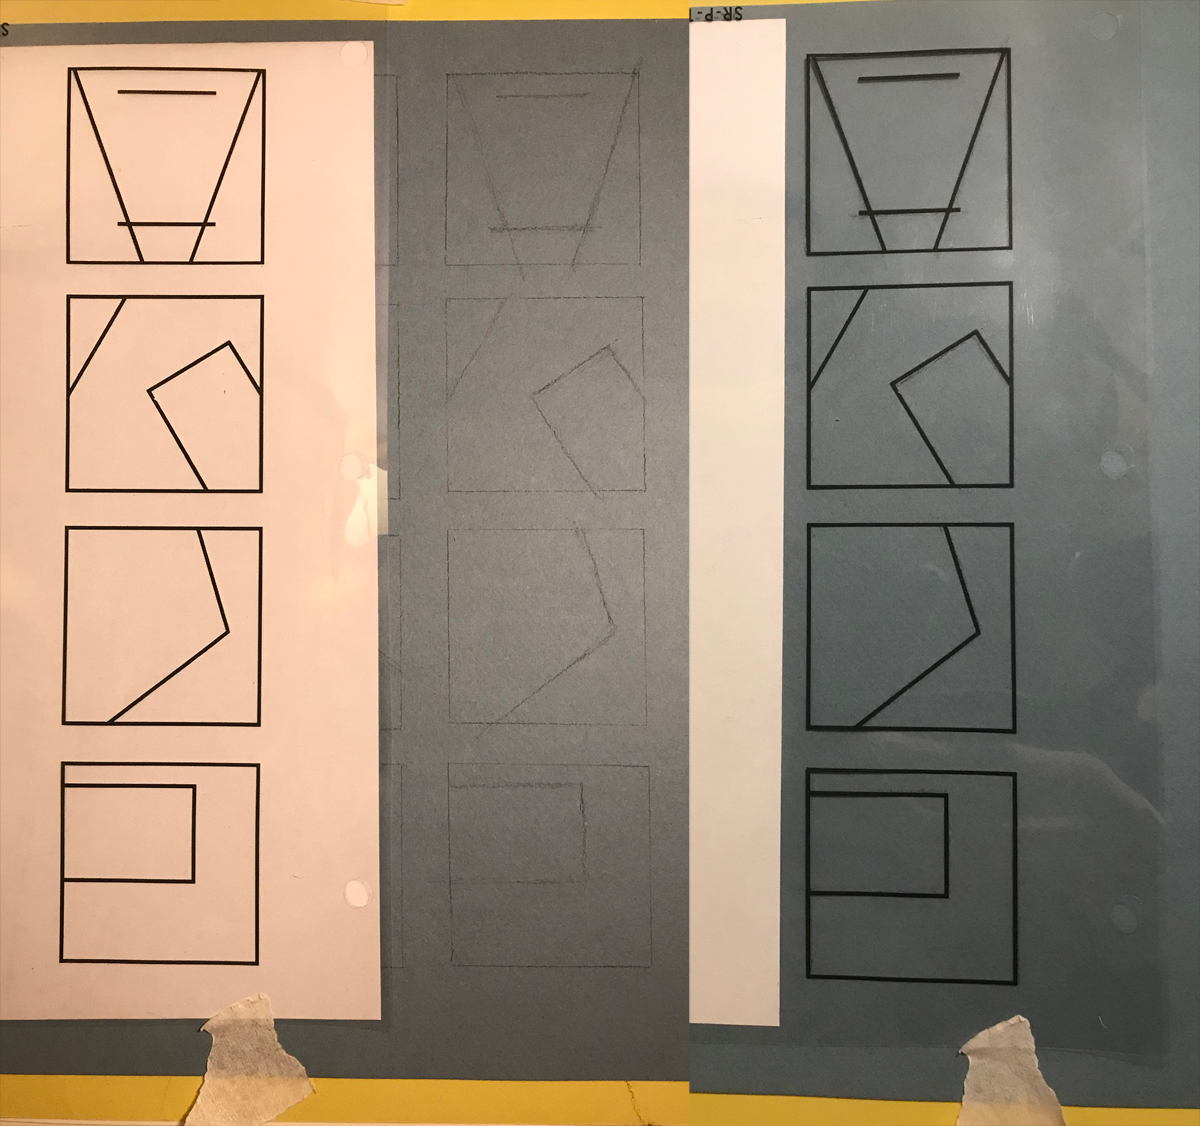
I did a repeat of the shapes from yesterday. Flipped the sheet upside down for an extra change too. Feels like I’m generally nailing these and getting confident in my choices now with rarely an adjustment needed. I’ll move onto sheet 2 tomorrow with its cumulative increase in difficulty.
template on left, my attempt in middle, overlaid on right.
The Shape Replications are looking good so far Martin. Remember to keep them as light as you can and make every attempt to curtail the urge to correct via multiple lines that collectively yield the “fuzzy” line (not that you are plagued with the issue by any means.)
The exercises are far more valuable than many tend to appreciate while in the trenches. It’s a great idea to flip or invert the page so as not to memorize the patterns–keeping the challenge fresh. Some even combine pages to yield a whole new collection of challenges. (Just an FYI—there are more available (although you would have to print them yourself) within the Visual Language Core found here:
Thanks very much for the feedback and those extra resources Anthony, you miss nothing - on at least a few occasions I have fallen victim to the “fuzzy” double/triple stroke line and was really just kidding myself that it did the job. I am going to be on top of this now and not just overcorrect when I know a line didn’t quite make it.
The notes for this exercise also mention after completing the worksheets the option of scaling these up for extra practice - how would you recommend doing that, squaring up or working out a ratio and using some calipers or something else?
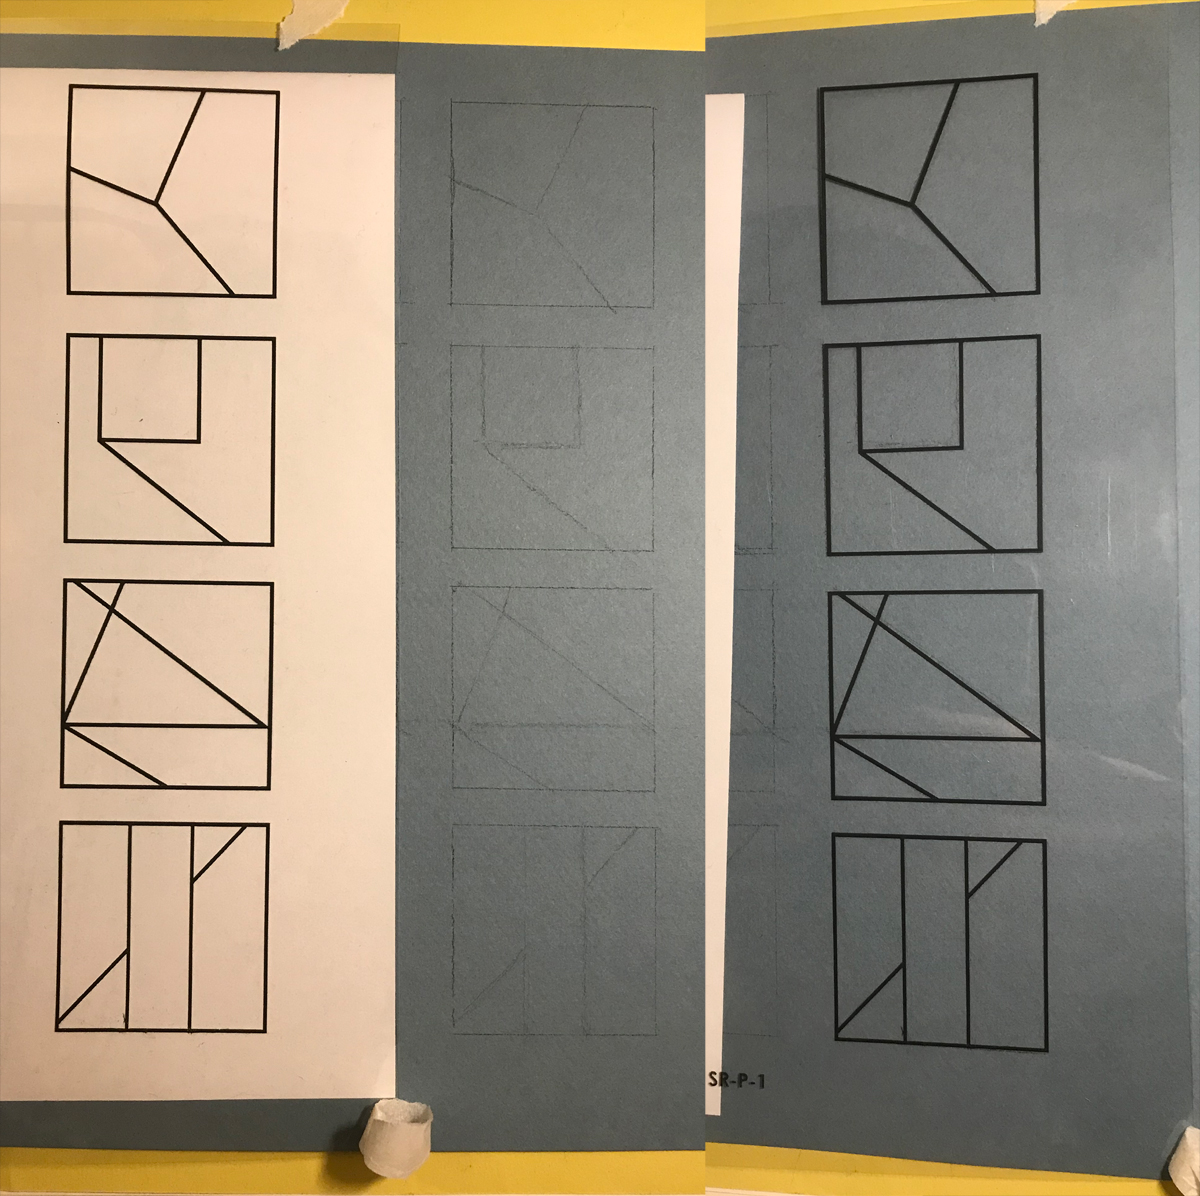
a bunch of shape reps from the following page, i’m going to have to take more care with the curves but am very encouraged, feel like i’m tightening my accuracy up already. these are generally well judged with a few corrections.
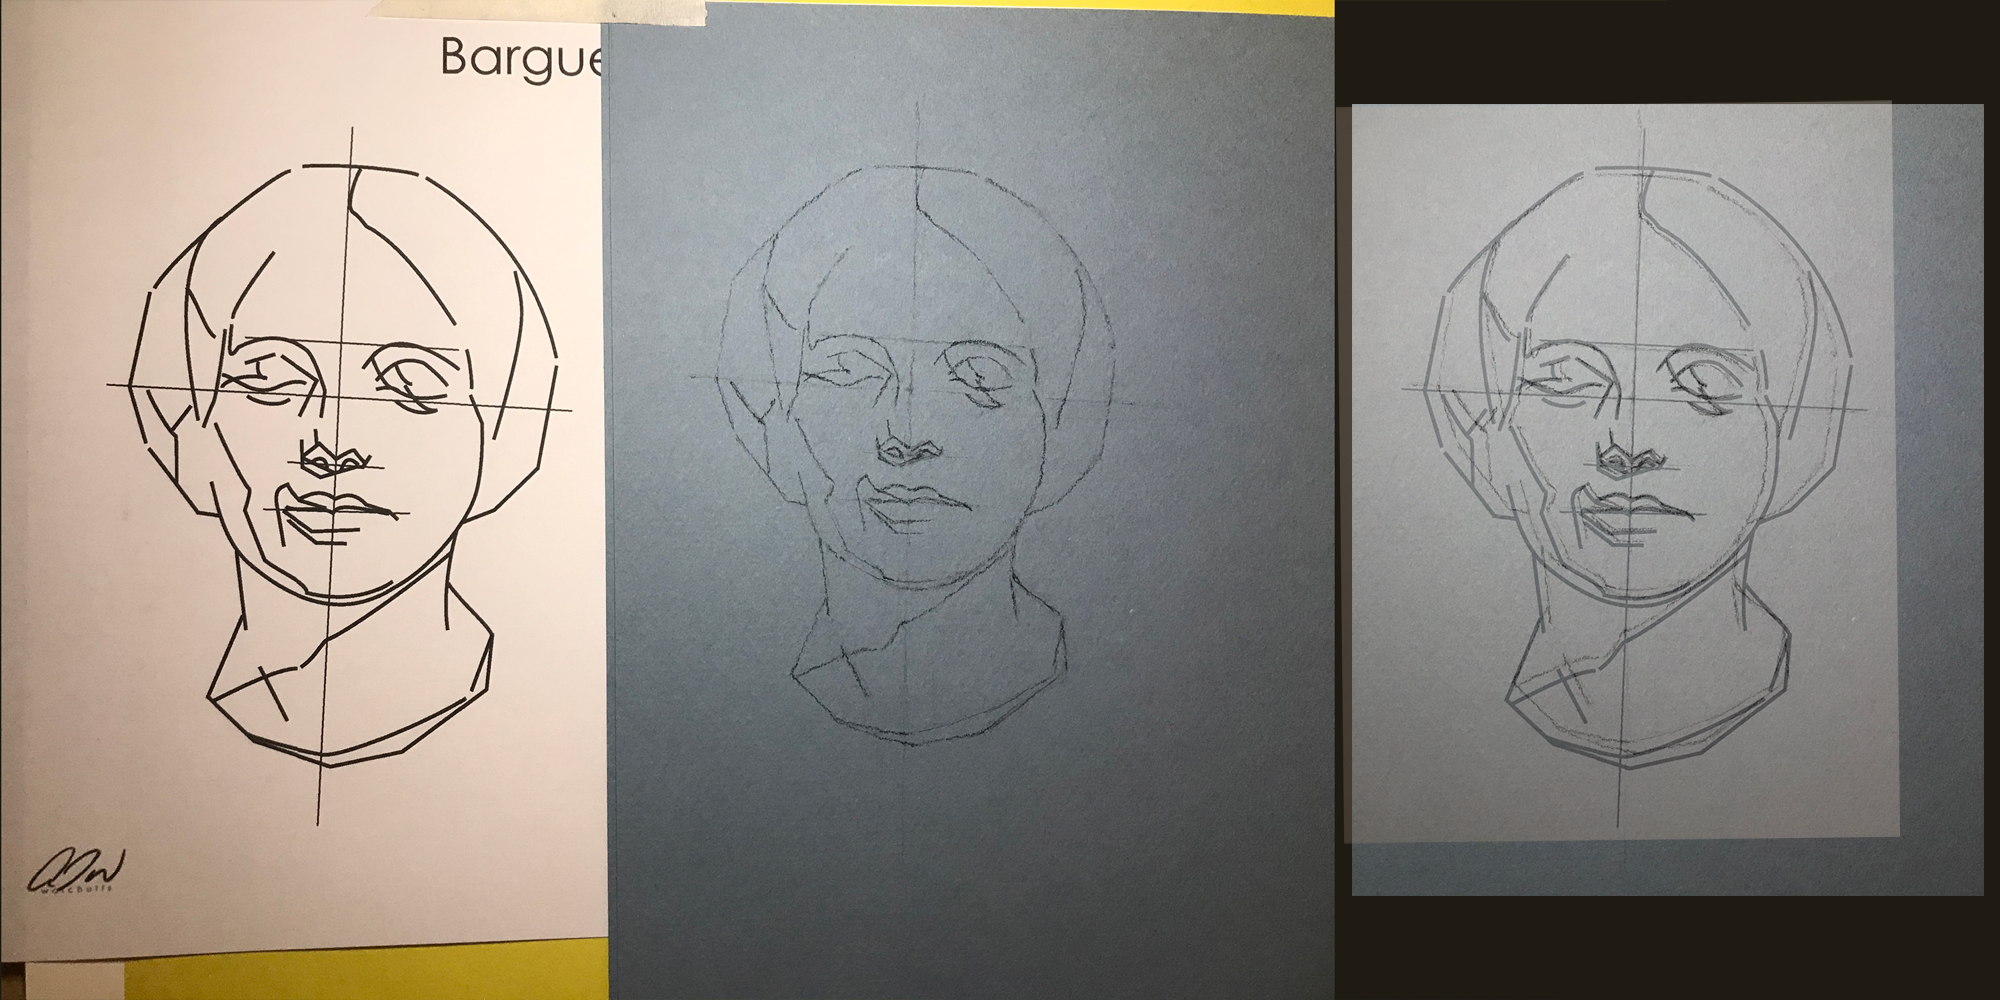
here’s a bonus one from an extra reference anthony linked on social media. it’s not 100% there but i feel like i got close to the likeness of the original.
These all check out dead on. I had to spend a good deal more time double checking points against each other and triangulating using compasses. Gonna flip this and do it again, then try the ones with curves. Enjoying the extra challenge of these.
LOL!!! OMG I’m dying over the portrait. I couldn’t stop laughing when I first saw it.
On a serious note—it looks like your line quality is getting much better. And what I mean by better it less “fuzzy” and less “heavy” in terms of line weight.
Additionally, it is OK to keep the curved lines found in later shape reps simplified into a collections of straight lines. This is from the Visual Language Core Part I Section A:
thanks anthony, yeah i think i’ll definitely breaking down those curves into straight edges in the later shape reps which i’ve just taken a look at, i think i’d be doing a lot of rubbing out trying to just nail those bigger curves freehand.
tonight i reversed the same first column of unbounded shapes i did the other day, found them harder this way around for some reason. i got them nice and accurate again though.
Tried the unbounded curved shapes today, I’m generally drawing smaller straight lines to try to match the curvature closely rather than abbreviate with larger straight lines, is that okay?
It’s OK but there is nothing wrong with having a bit of a trail off past the destination (as with OD.) Either way they are really looking good Martin! How confident are you feeling with it? Feel like trying a Bargue redux?
I thought I was doing pretty well until I overlaid this in photoshop, (overlay is on the right)… I can see immediately where I went wrong visually, but I was checking/measuring with compasses too, so I’m not certain where things started going off course. I assume there’s a cumulative error and I should perhaps measure everything from a single point of reference instead of jumping around. I did the crosshairs first and they’re pretty good. But I’ve made her visibly thinner and can’t believe I couldn’t see it while I was working. In my defence I am pretty tired tonight but still, I clearly need to do more of these.
An awesome effort nonetheless Martin. Your continued careful analysis of these exercises will really go a far way to efficient/effective development. I would indeed recommend trying a few more from the collection. I personally found them fun to do.
Thanks for the encouragement Anthony, I will definitely do more of these over the next week or so. I have already noticed my attention to detail and overall approach to these replications improving. It’s now more procedural than haphazard, which means I’m also speeding up my process. So - I can practice more!
And yep I really enjoy these too, there’s surely little more satisfying than overcoming problems, especially ones of your own making
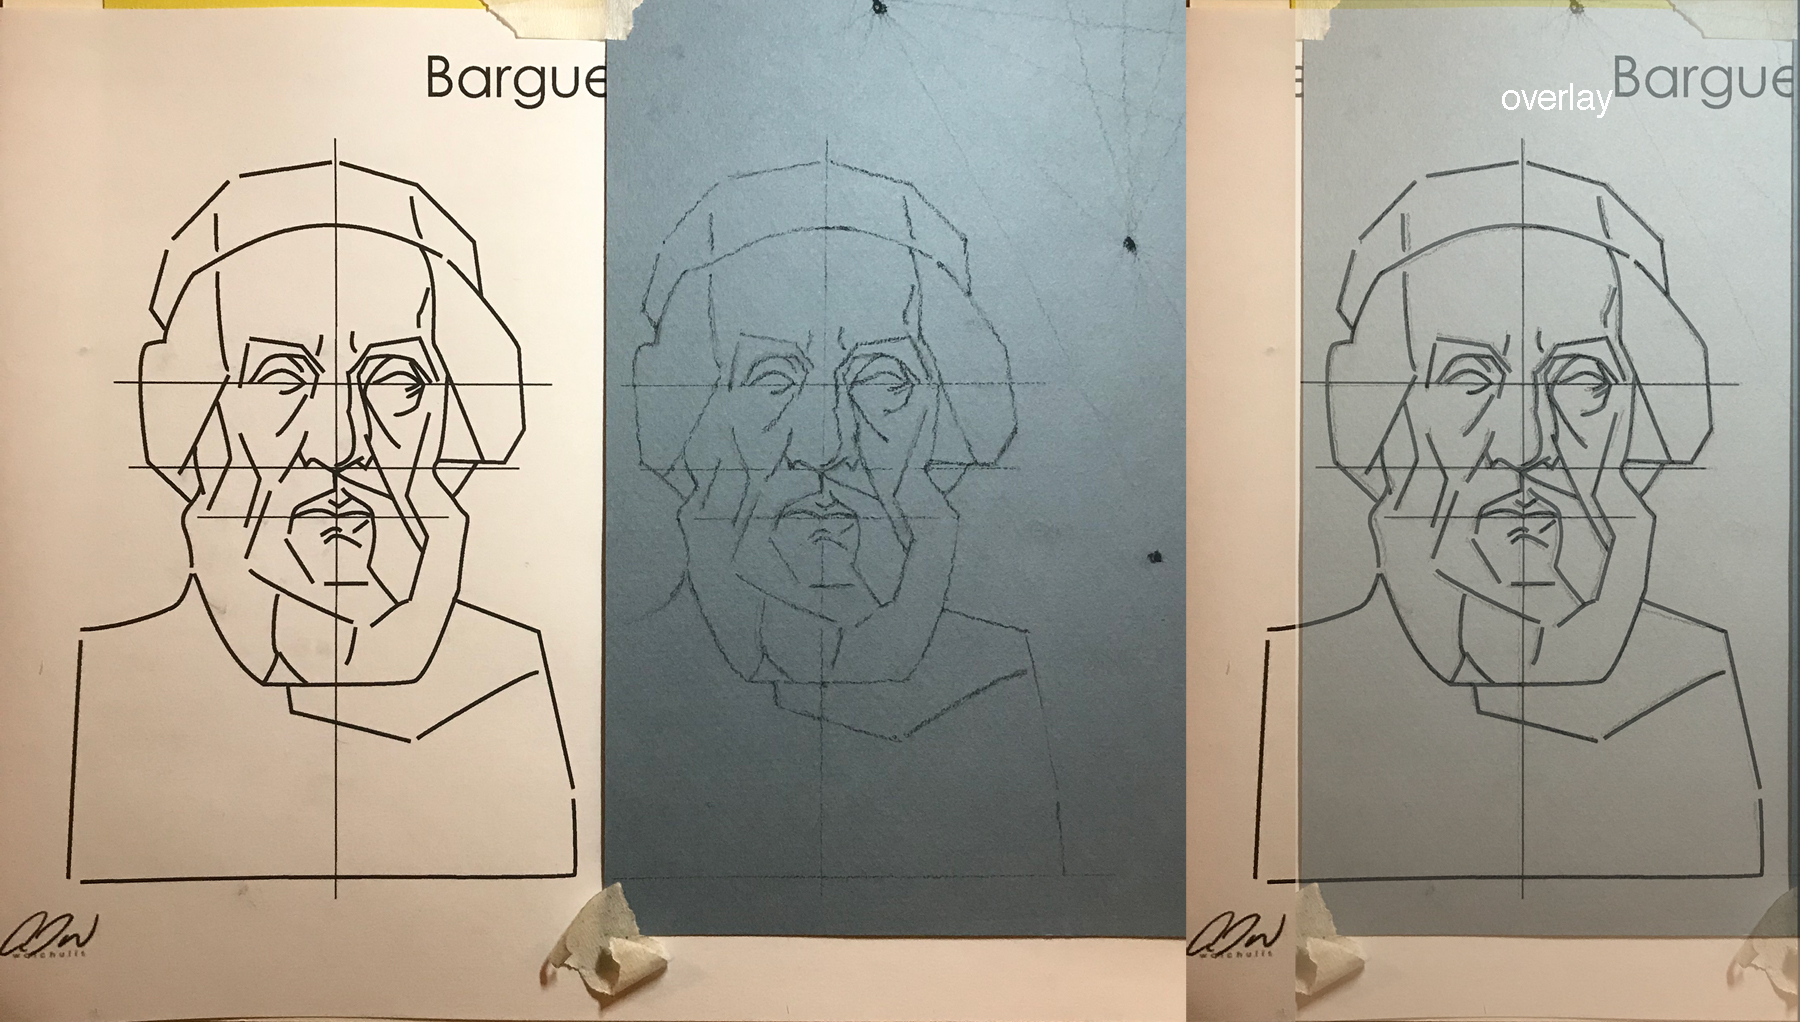
I went for a simpler one this time. Still managed to mess it up though, thought I was so careful measuring this out too. But I think my vertical line wasn’t quite as parallel to the bargue as it should have been with some disastrous knock on effects.
Here’s the photoshop overlay. I rotated it slightly to line up the vertical as best I could. There could be a little skewing going on from my camera angle I too suppose, but the whole bottom looks much too far out to be solely that.
I know I measured and double checked the top of foot to bottom of foot length and it was bang on. But it’s clearly longer here so I’m putting it down to tiredness again. Back to the drawing board. Got a couple more lined up for next week, hopefully I’ll get one right eventually
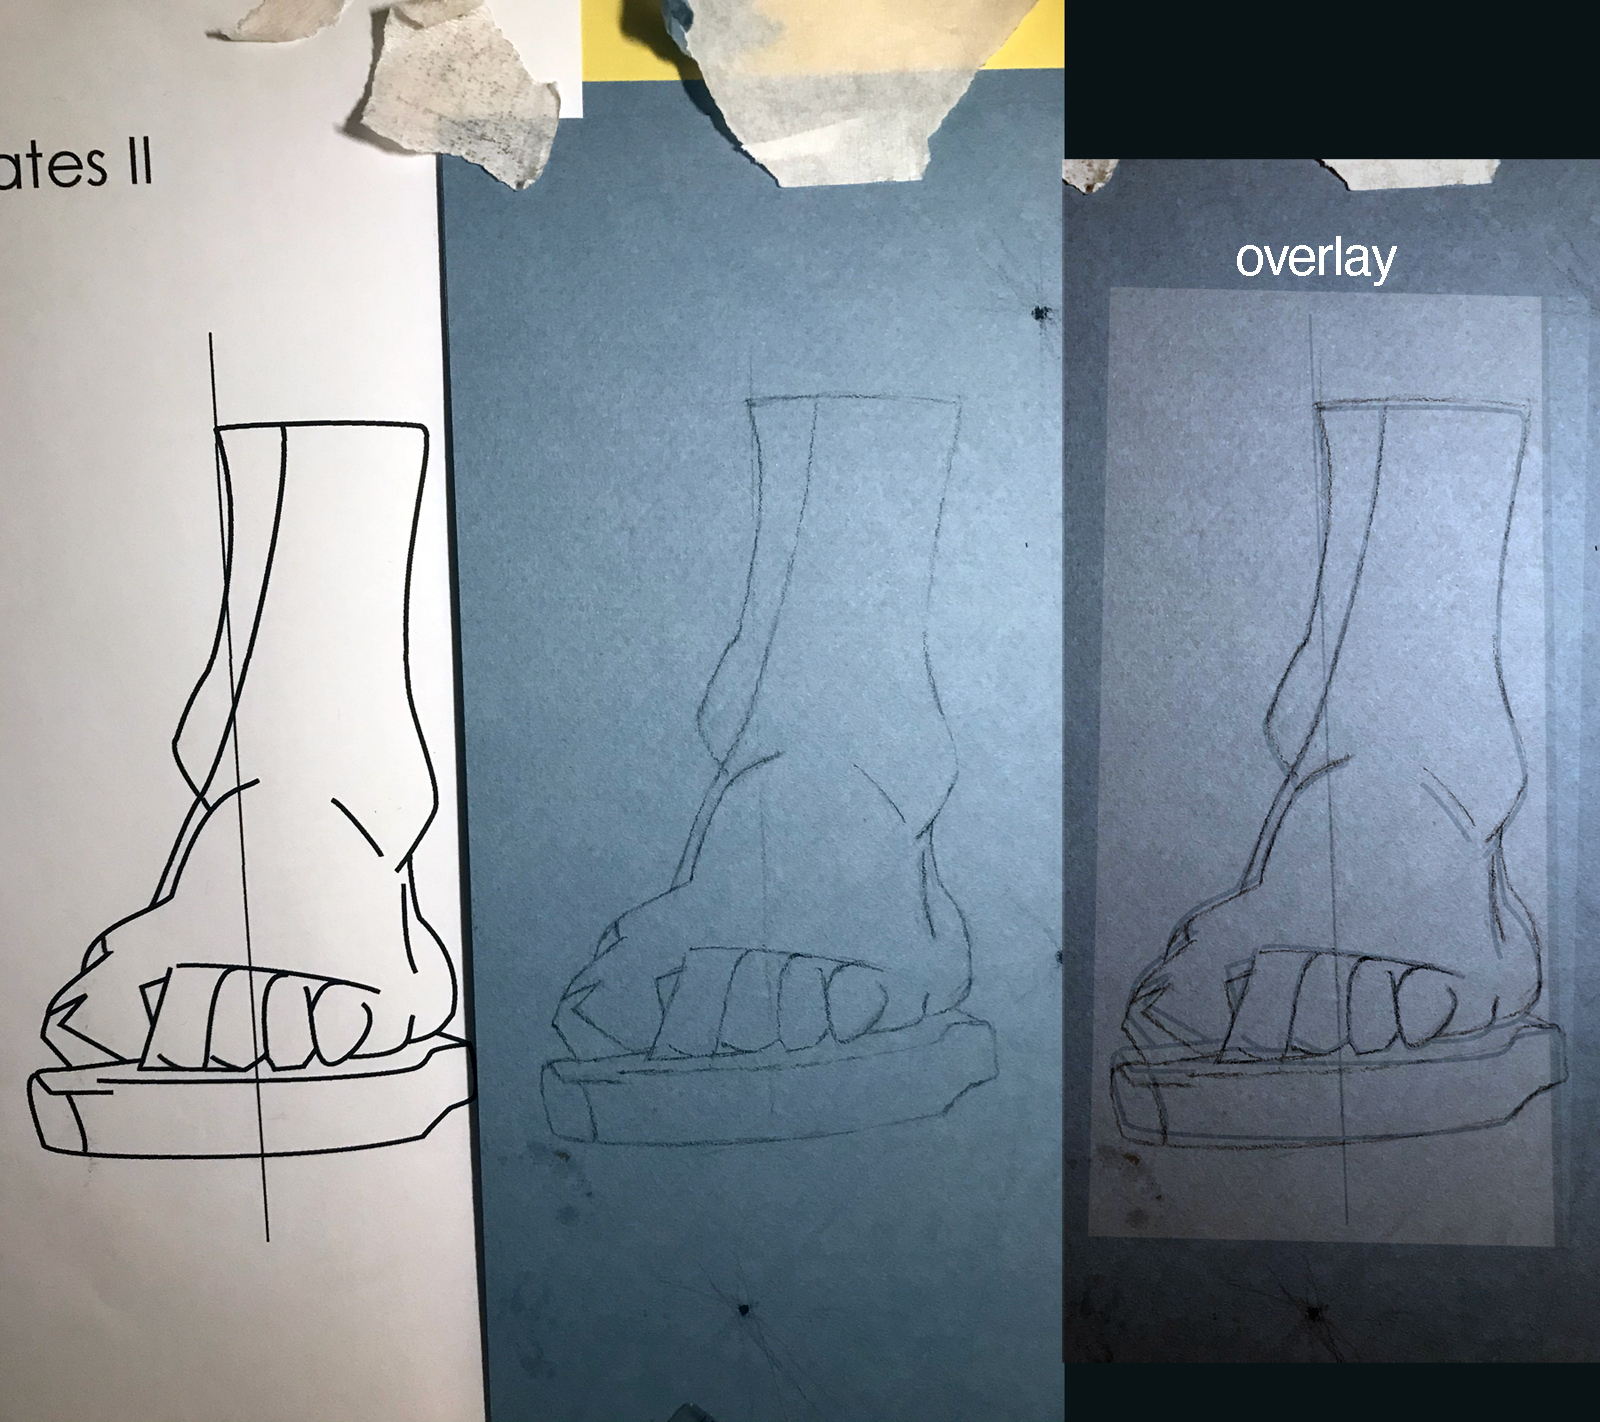
I tried the more developed bargue foot next. still off as per the overlay, but not by quite as much as the last one. My initial vertical (or slightly oblique vertical) was not quite right leading to a larger distortion by the time I got lower down (I started at the top on this one). No sure if there’s an ideal procedure for these, like do all the horizontals/verticals and get proportions, then fill in the gaps might work. So far I’m picking the easiest or most prominent initial line or two and anchoring off from there.
Oh my, did you do those standing or sitting? How do you hold your pencil, also how did you get nice vertical lines, mahl stick, or freehand? Also do you use a tool to plot points or use best guess?
this was before i got an easel set up so these were mostly done on a drawing board balanced on a chair, i was struggling with finding a comfortable vertical drawing position so this was a mixture of being awkwardly bent forward sitting down or later kneeling on the floor to approximate a standing at easel position.
i change my pencil grip a lot depending on what feels comfortable for whatever i’m trying to achieve, the longer verticals were done mainly holding the pencil at the back like a paintbrush (almost like if you had a tiny cocktail sword and were wielding it between thumb and forefinger) trying to mainly let the weight of the pencil draw the line while my hand fell downward in as straight a fashion as possible. horizontal lines i often hold the pencil in a similar underhand fashion, smaller directional lines i might hold the pencil as though i was writing. i still haven’t really got a specific technique for anything, just trying to feel it out until something evolves into a natural and comfortable style for me.
the vertical lines were all freehand, but it would often take a couple of goes to produce a straight enough line of that length (it’s easy enough to check them afterward with a ruler) more difficult was getting the line close enough to 90º from the horizontal, i think for one of the bargue reduxes i measured from the edge of the paper at top and bottom and marked a dot so I knew the line was bang on vertical if I hit both marks, i could also allow for the width of the drawing that way and not accidentally fall off the edge of the paper.
it is all best guess first, then measuring to check the placement afterwards, and correcting if necessary, that way you’re training your eye rather than simply practicing using compasses.
 didn’t quite set up right and drew a couple of boxes out of alignment which I paid the price for, so no cutting corners next time.